Automate customer interactions using APIs and Integration Demo
- Introduction
- Setting up Watson Tone Analyzer
- Setting up Salesforce
- Connecting CP4I to your endpoints
- Creating Portal Dev User
- Cloning the Demo Scripts
Introduction
You are going to integrate with Salesforce and IBM Watson Tone Analyzer service. You need to have these services and endpoints created and all the credentials necessary to integrate to them securely in the demo.
IBM Watson can tell if someone is happy or sad or angry or many other emotions! If your customer is angry, you want to know so you can make them happy – you’ll use this to look at the customer’s description of the damage/problem and put the tone into our Salesforce case so that when we call them, we know what to expect.
Salesforce is a CRM system provided as a SaaS i.e. it is hosted in the cloud. In this scenario, we as a car repair company will use Salesforce to create and store our car repair claims.
Setting up Watson Tone Analyzer
WARNING: Since 24 February 2022, the Tone Analyzer tile was removed from the IBM Cloud® Platform for new customers; only existing customers will be able to access the product. If you already have Tone Analyzer service in your IBM Cloud account, follow the step below to copy the Tone Analyzer URL and API Key. If you don’t have it, please contact Rafael Osorio (rosorio@br.ibm.com) by email or slack to get details of a shared Tone Analyzer account.
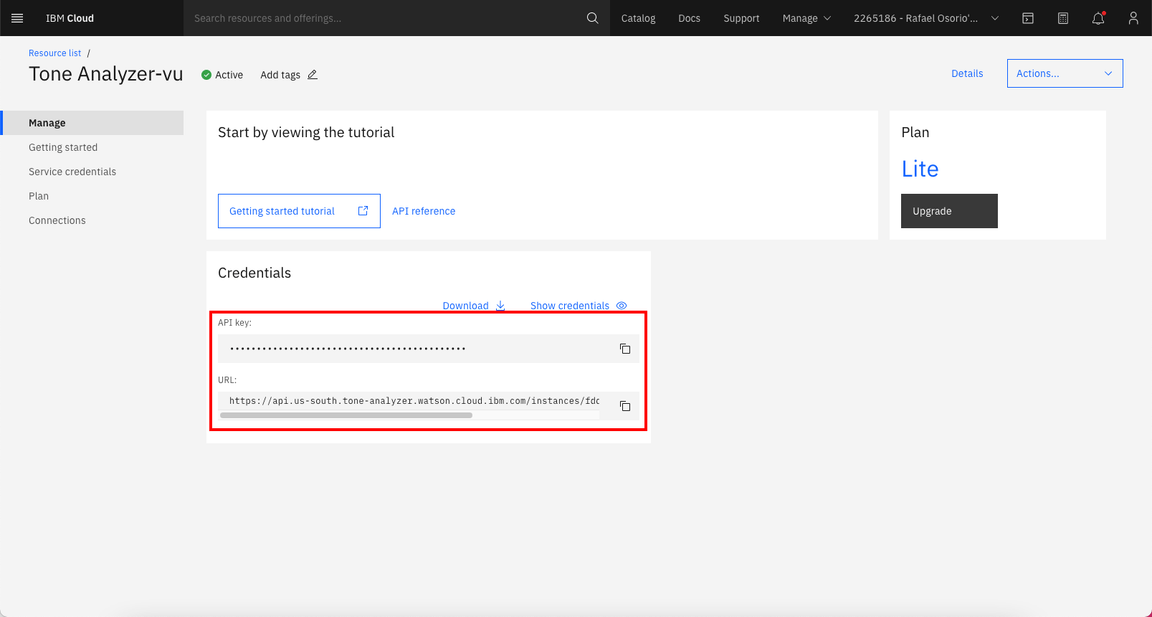
1.On the Tone Analyzer service Manage tab, you are able to copy the API Key and the URL that you will need to integrate with the service. Copy/paste them somewhere for later use in this demo.
Setting up Salesforce
Now, let’s set up Salesforce. You will need a developer account to use for testing – if you already have a Salesforce developer account, you can use that – if not, you can sign up for a free developer account now.
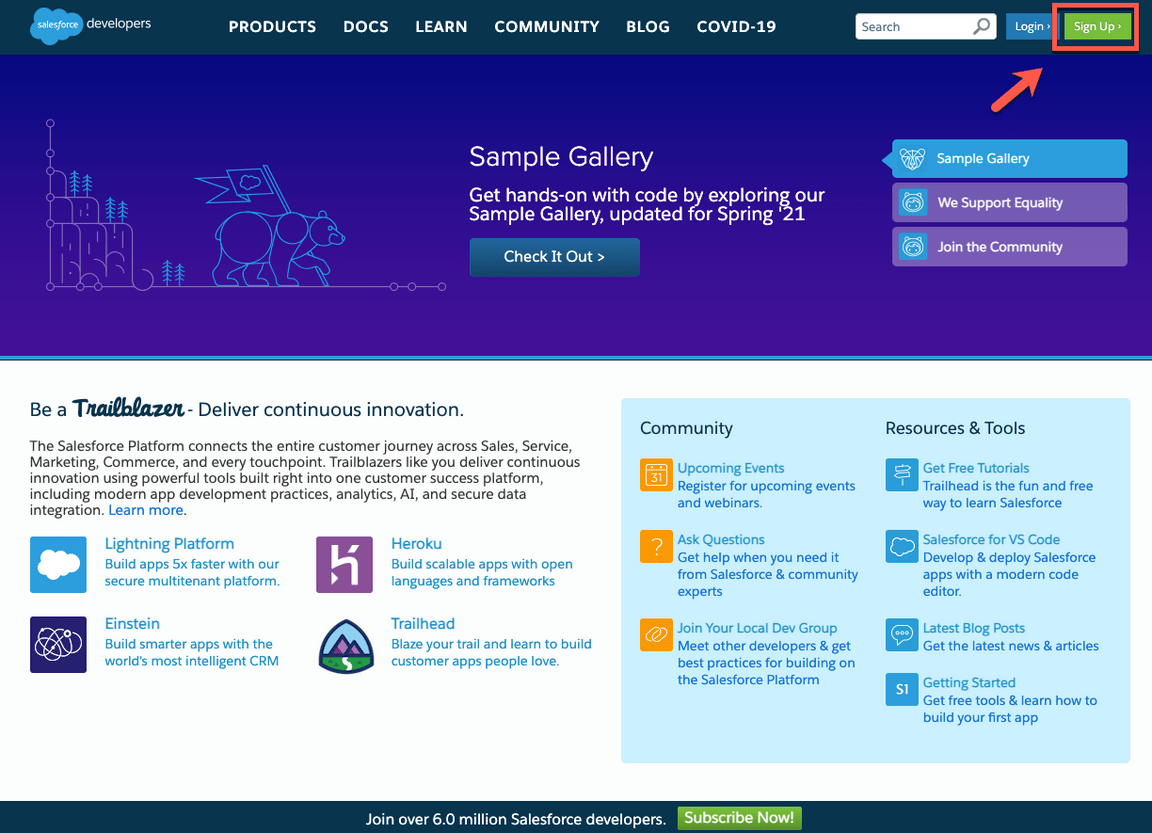
1.Go to (https://developer.salesforce.com) and click on Sign up.
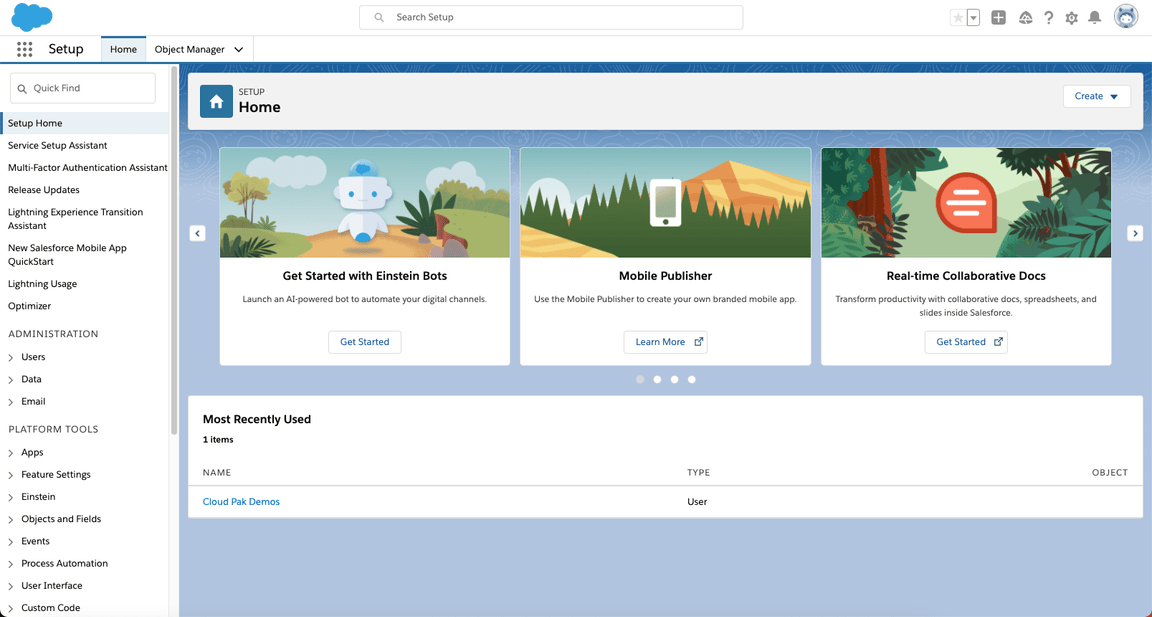
2.As soon as you have your account, log in with your dev admin account.
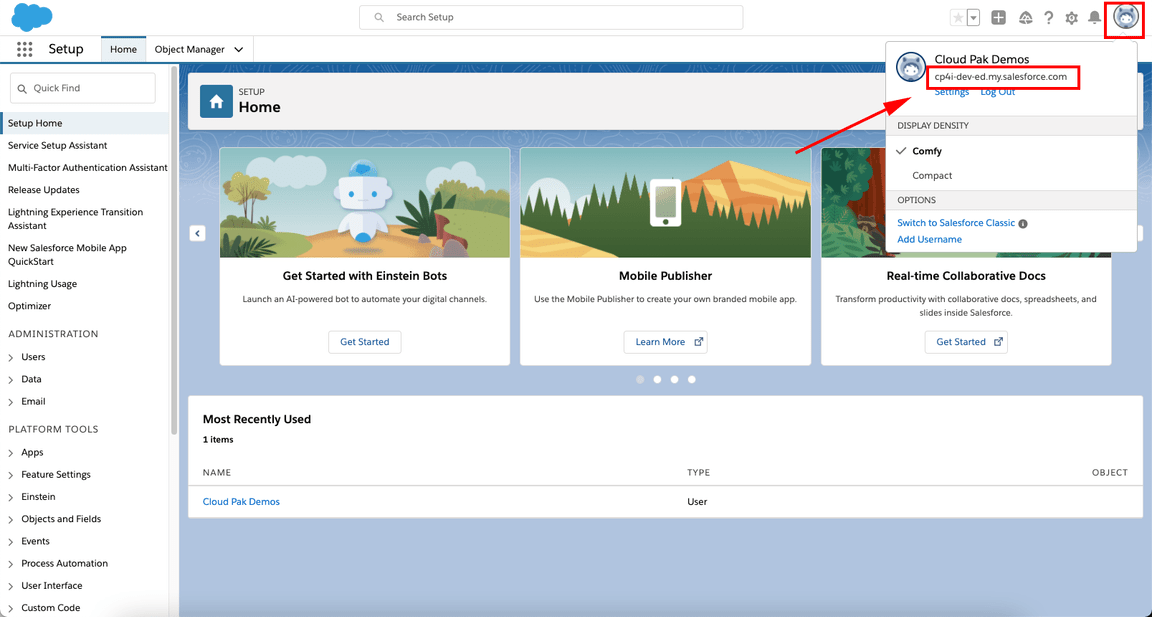
3.To get your Salesforce integration URL, click on your user profile. The URL text below your Account Name is your login URL. Copy/paste it somewhere for later use in this demo.
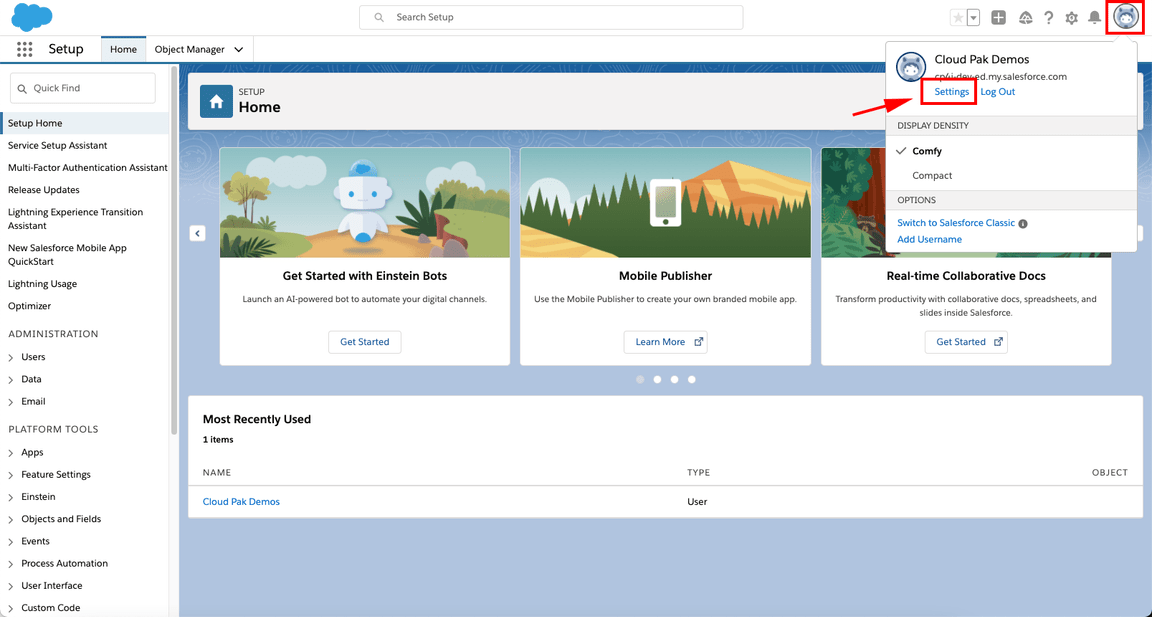
4.Next, you need to retrieve Security Token. For this, click on your user profile and select the Settings option in the profile panel.
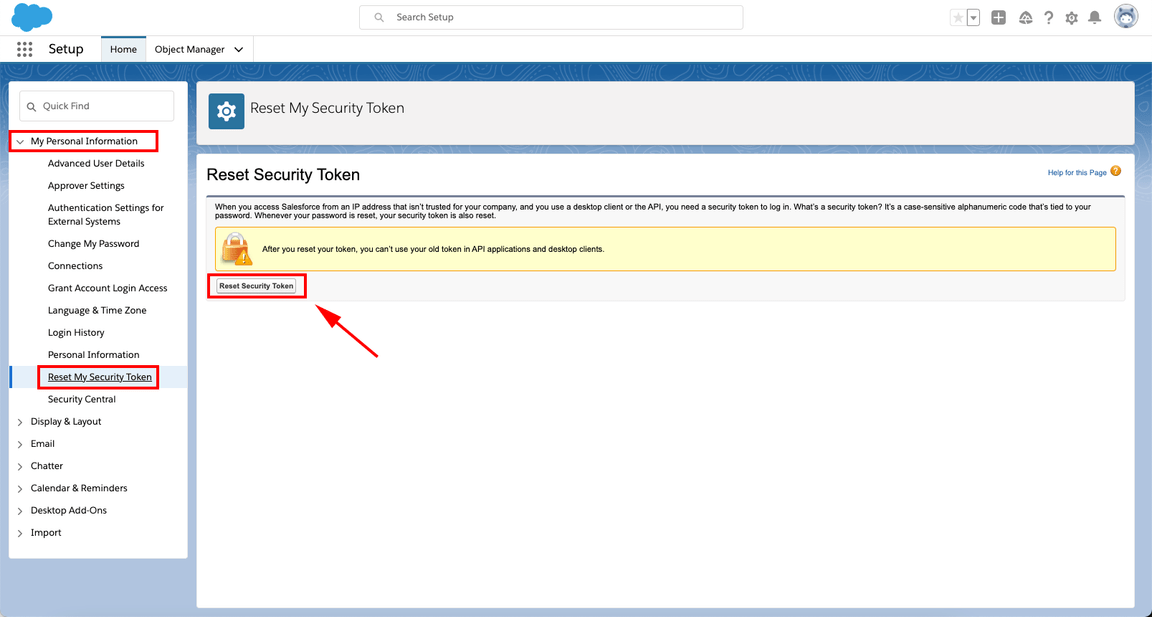
5.Under Settings, find and click the Reset Security Token option. Then click on Reset Security Token Button and it will send the newly generated security token to your email.
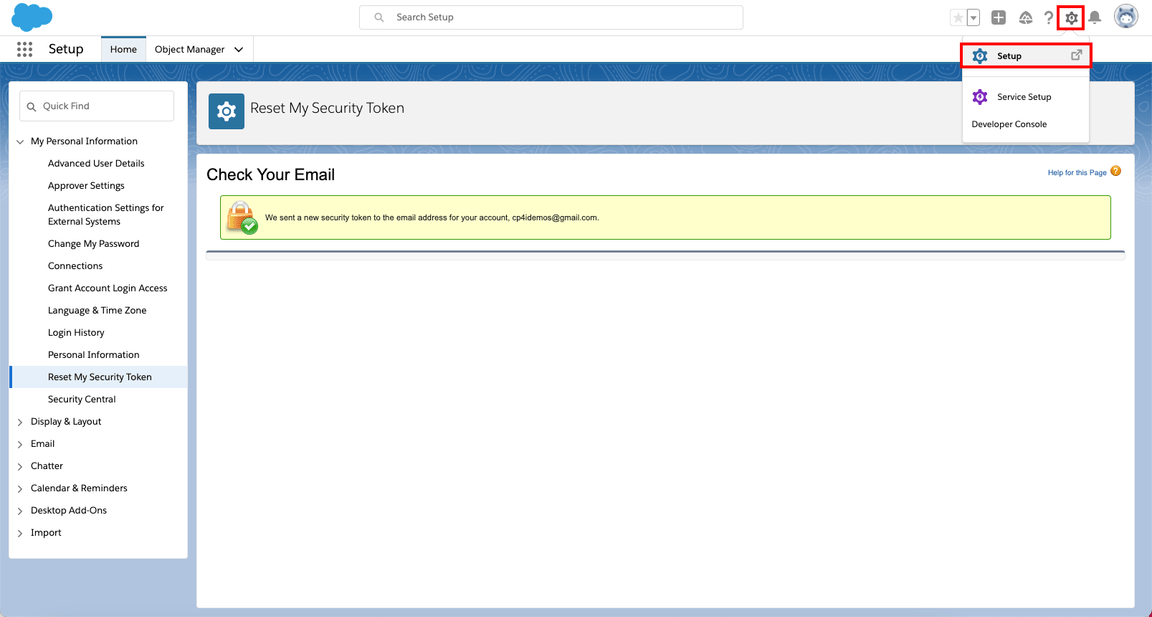
6.Next, you will retrieve the Client ID and Secret. Click the setup cogwheel at the top right.
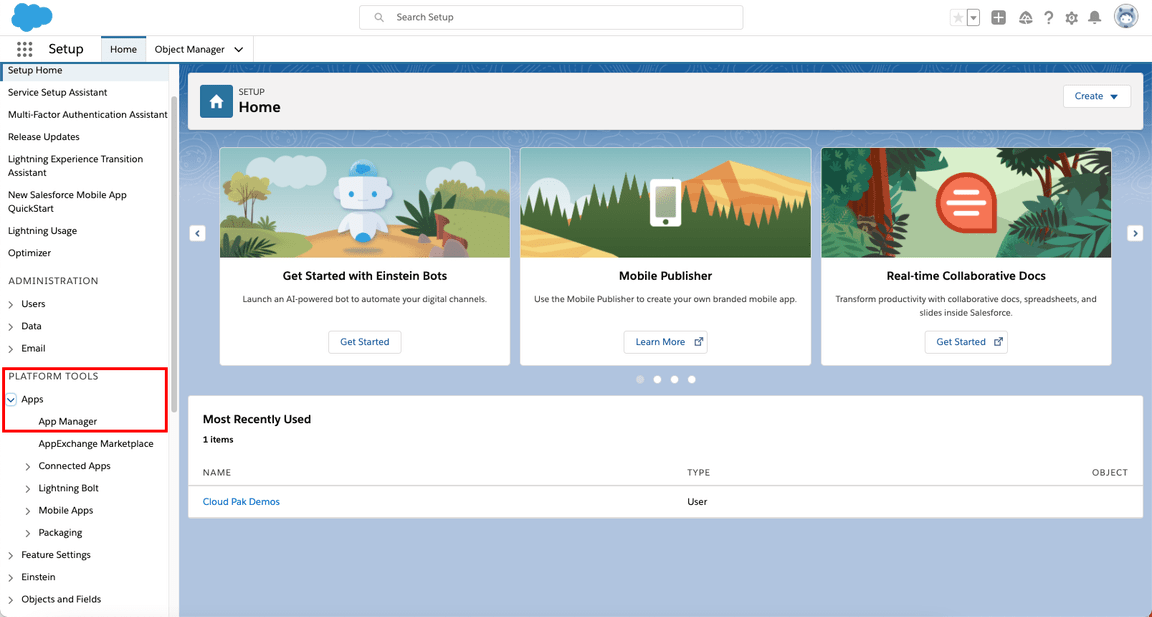
7.On the left navigator, go to PLATFORM TOOLS > Apps > App Manager.
8.Now click on New Connected App button.
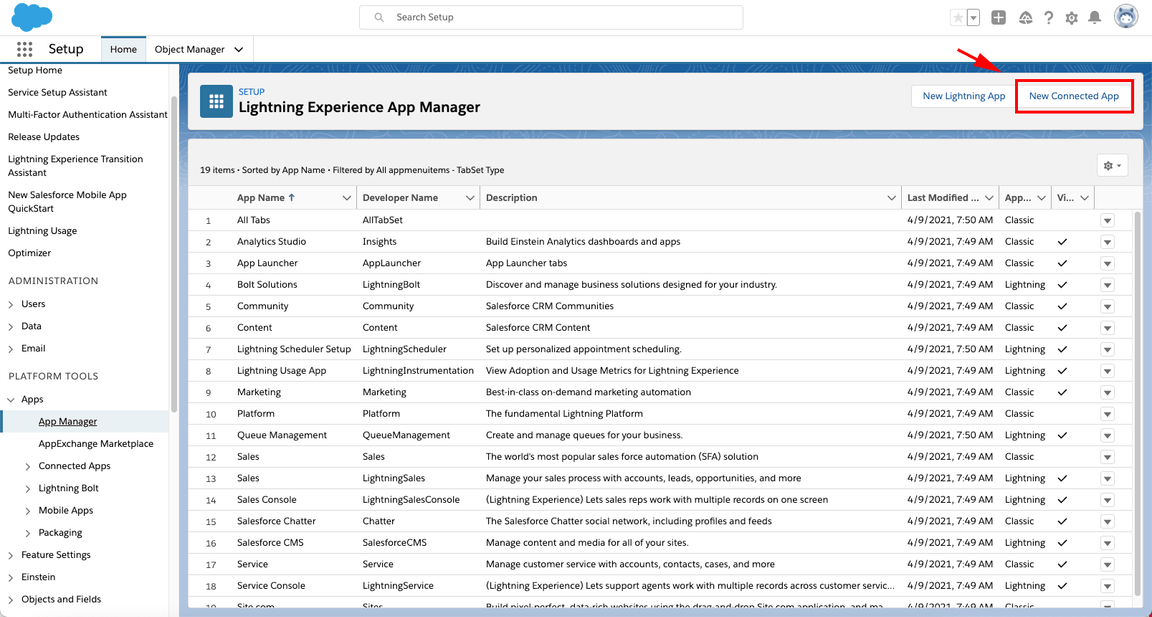
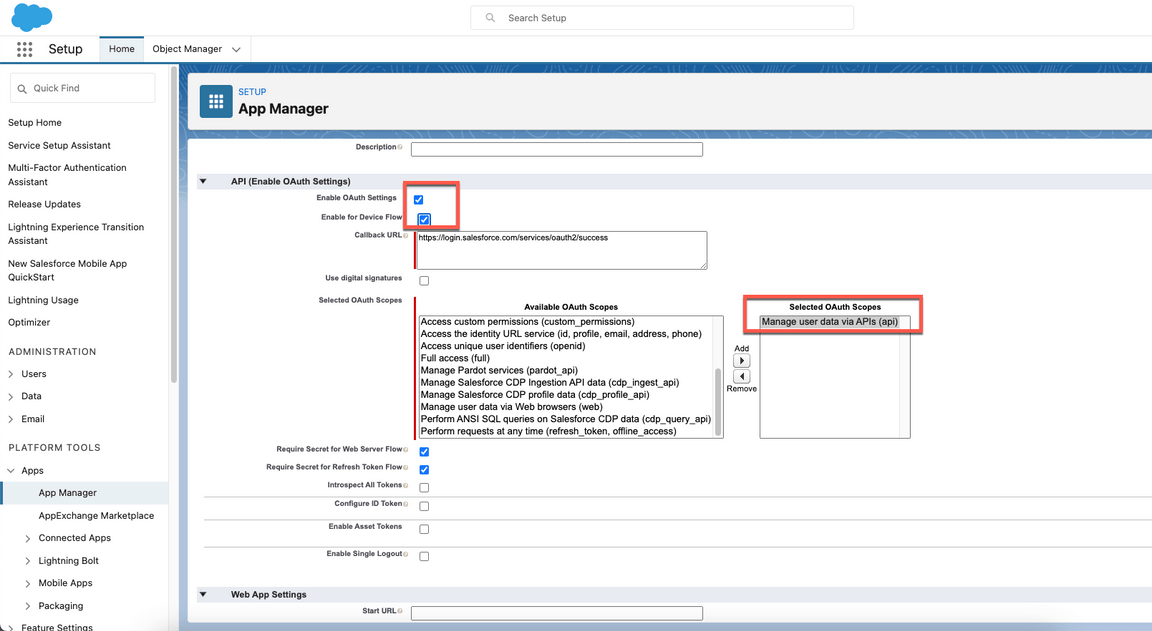
9.Enter App Connect as Connect App Name. Enter you admin email as Contact Email. And mark the Enable OAuth Settings. Either click on Enable for Device Flow. Now select the Manage user data via APIs (api) as a Selected OAuth Scopes. And then click on Save.
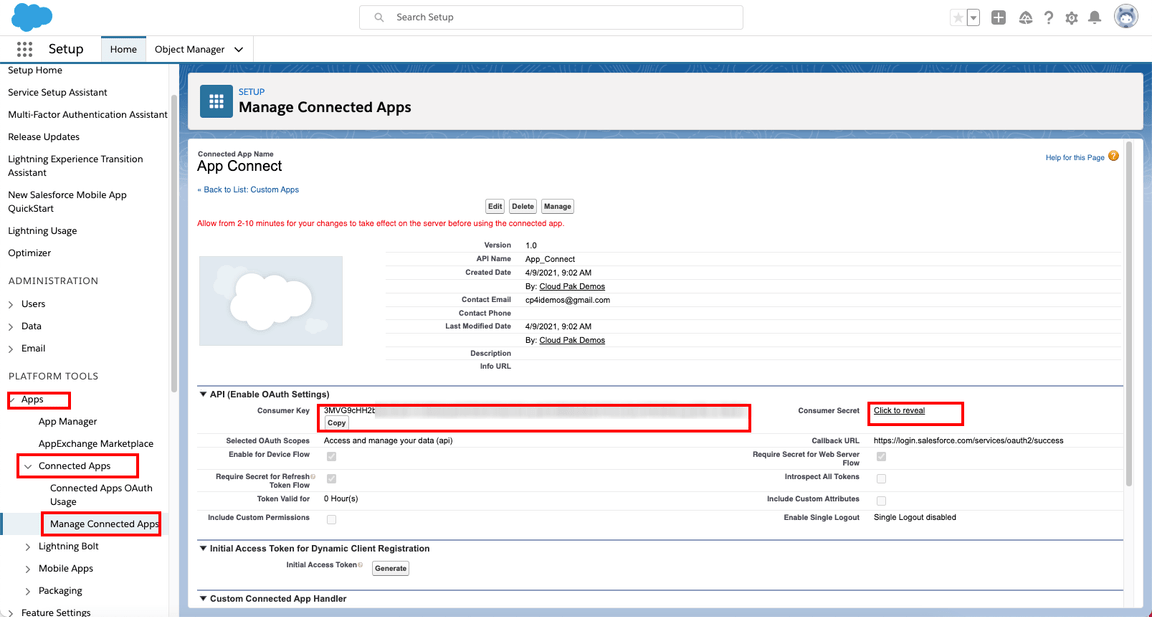
10.It may take several minutes for newly created Connected App to be registered. Once registered go back to Apps > Connected Apps > Manage Connected Apps. Here you can copy the Consumer Key and Secret.
Great, your Salesforce Dev account is ready, now let’s configure CP4I to the services endpoints!
Connecting CP4I to your endpoints
Now, let’s configure our Services Endpoints in Cloud Pak for Integration. Let’s do it!
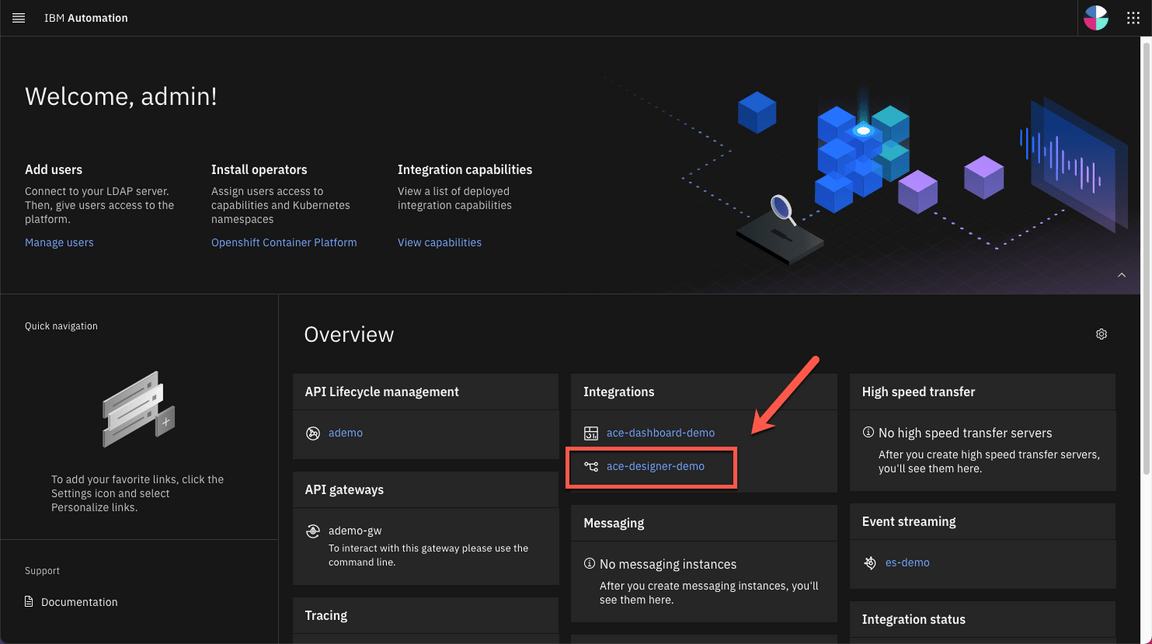
1.Open your Cloud Pak for Integration Home page (if necessary, check here how to do it - step 11). On the Integrations area, click on ace-designer-demo.
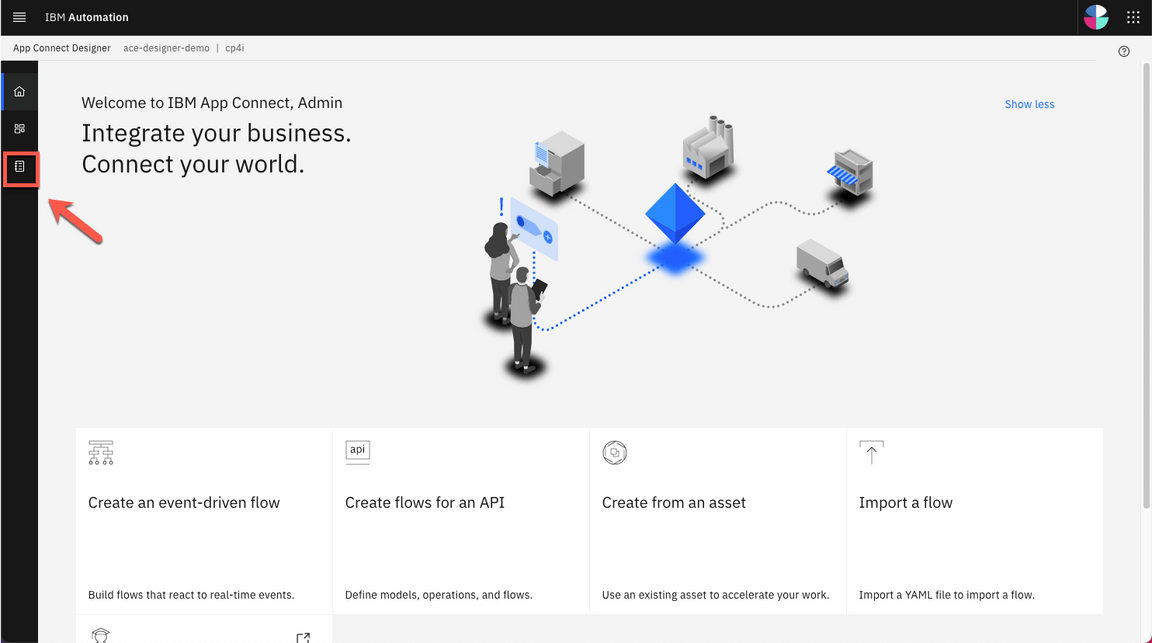
2.Open the Catalog.
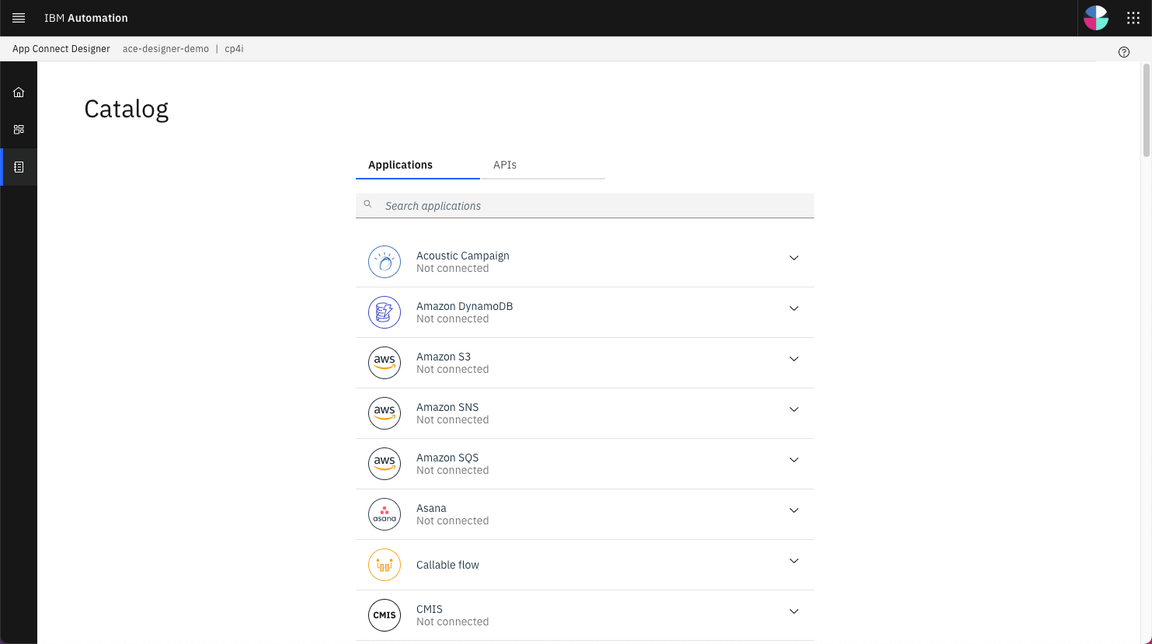
3.Here you can see a list of the available connectors.
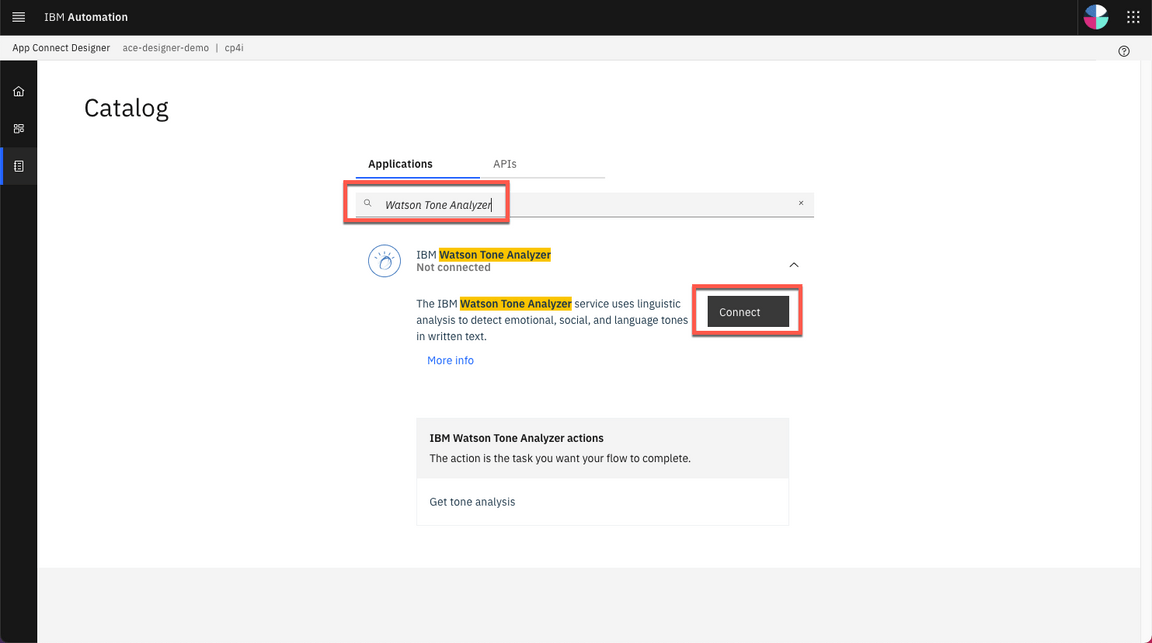
4.Search for Watson Tone Analyzer and click Connect.
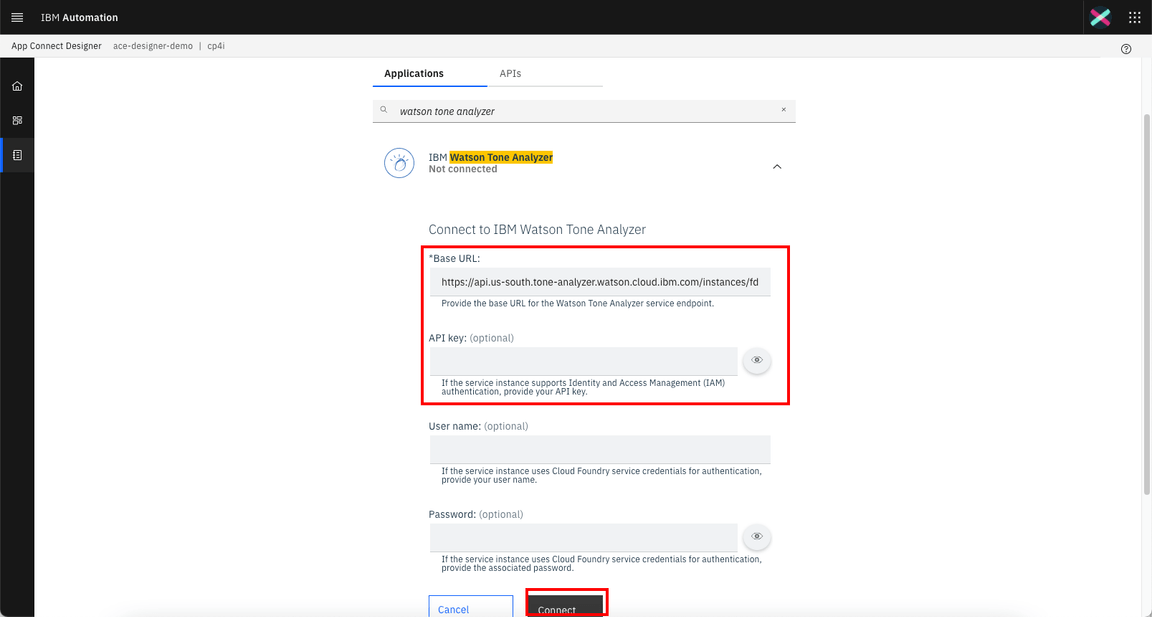
5.Now you need to inform your URL and API key. Click Connect to create your account.
6.Great! A connector account was created for you. However the integration flow that you will import later, it will look for a specific account. Because of that, you need to rename the account to work seamlessly. Let’s rename the Account1. Click the three dots menu and click Rename account.
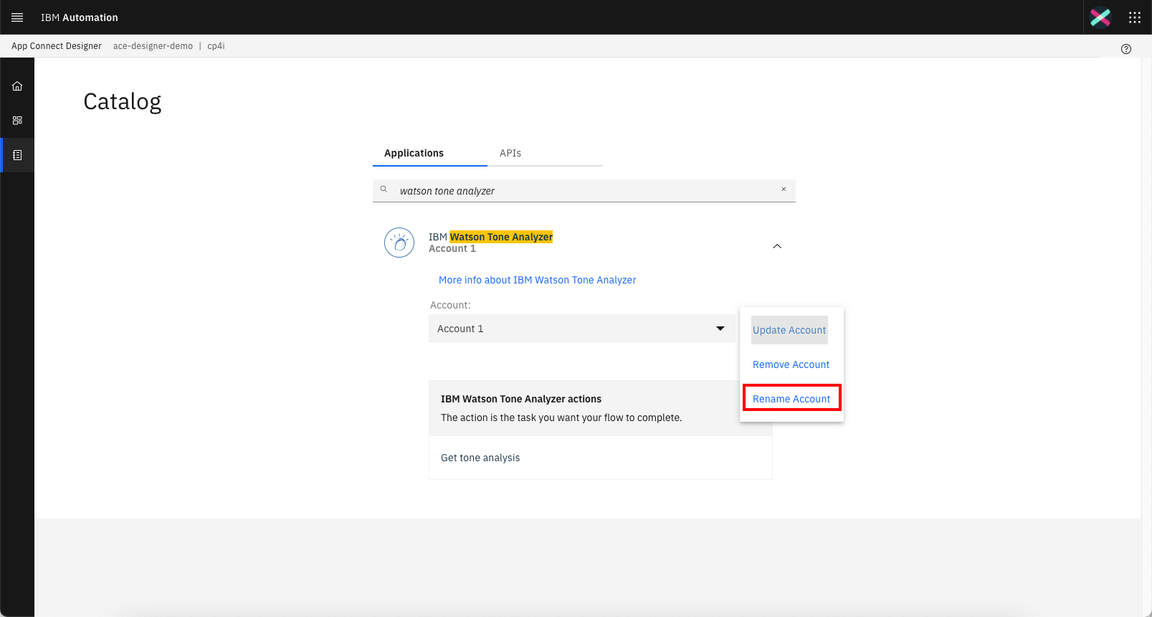
7.In the dialog box, name the account App Connect Trial (exactly as shown – capitals on the first letter of the words, spaces between the words) and click Rename Account.
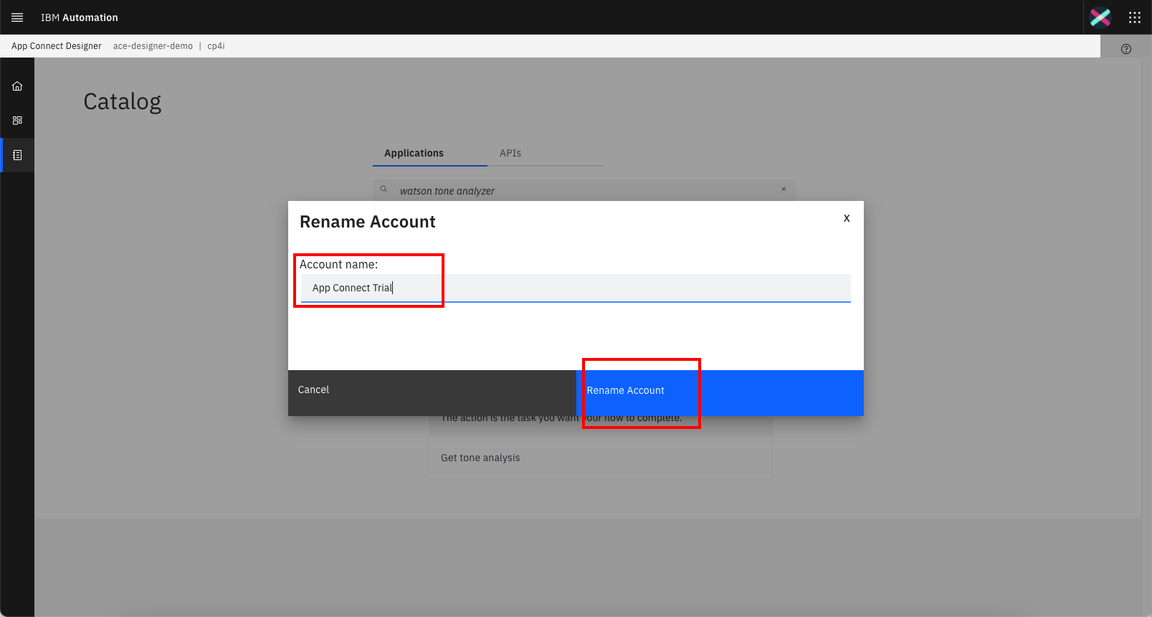
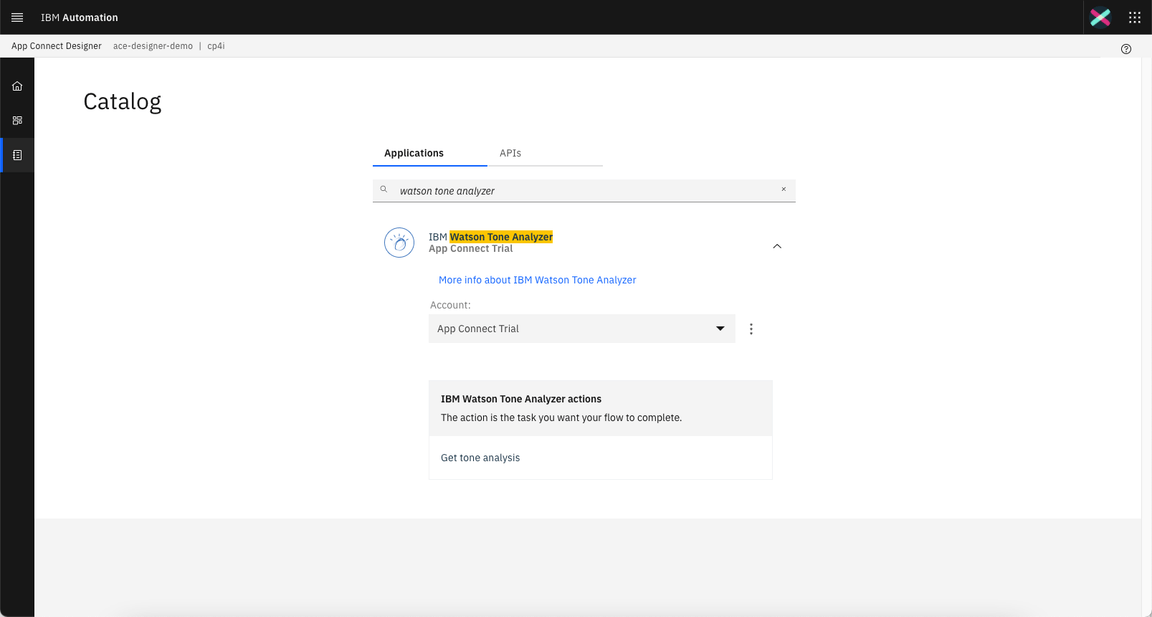
8.Great, now you have an IBM Watson Tone Analyzer - App Connect Trial account.
9.Now, it’s time to configure the Salesforce connection. Search for Salesforce and click Connect.
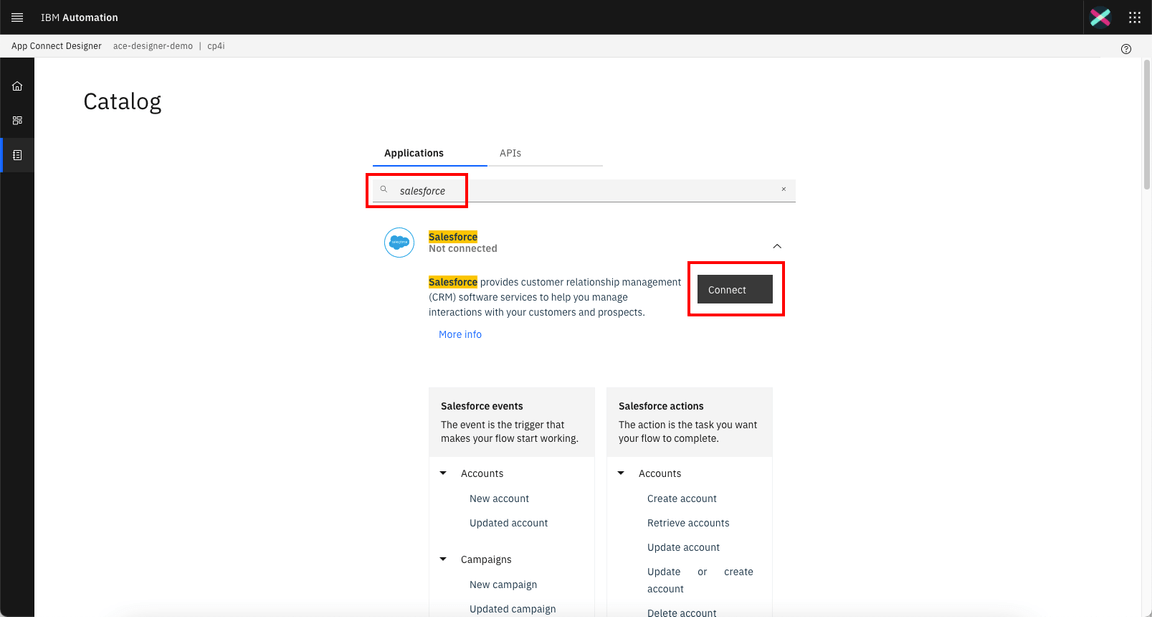
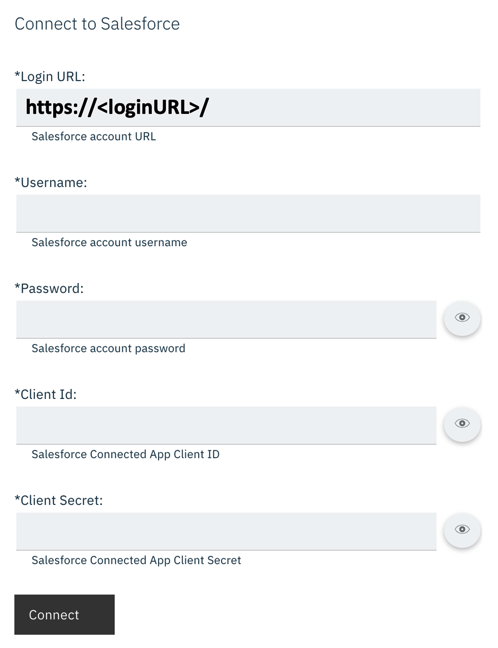
10.Here you need to enter your Salesforce credentials. Insert the login URL into the connector account form as shown below. IMPORTANT: You MUST enter the ‘https://’ part as well – it won’t work if you just copy/paste from the salesforce screen.
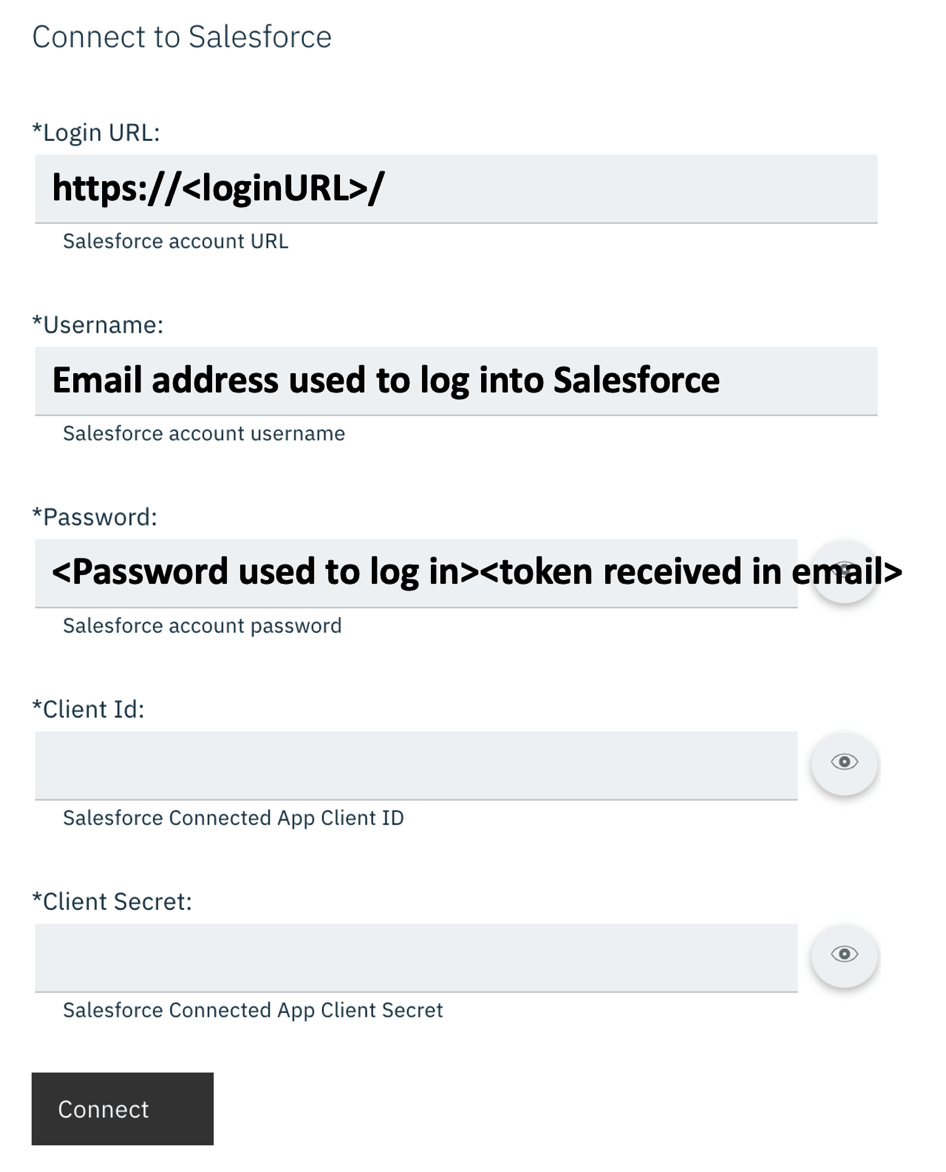
11.To populate the Password field on the connector account screen you will need to concatenate the Password used to log into the Salesforce account with the Security Token received via email. For example if you Salesforce password is ‘myGreatPassword’ and your Salesforce security token is ‘2325jsdhew4312hs534dh’ then you should enter ‘myGreatPassword2325jsdhew4312hs534dh’ in the password field.
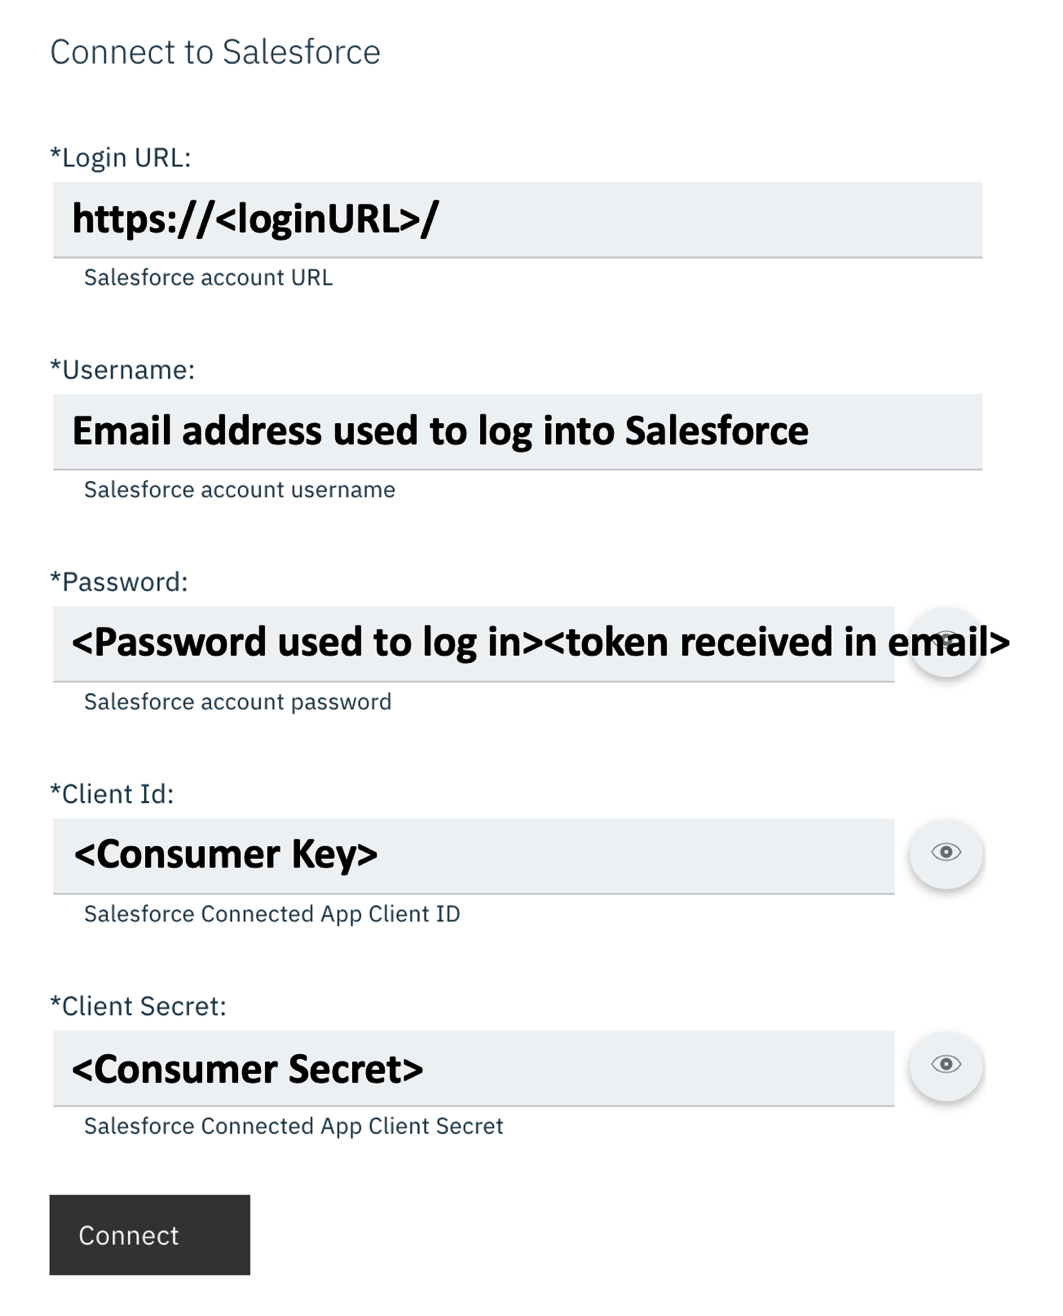
12.Use Salesforce’s Consumer Key and Secret as Client ID and Client Secret respectively as needed in the connector account UI as follows and click Connect.
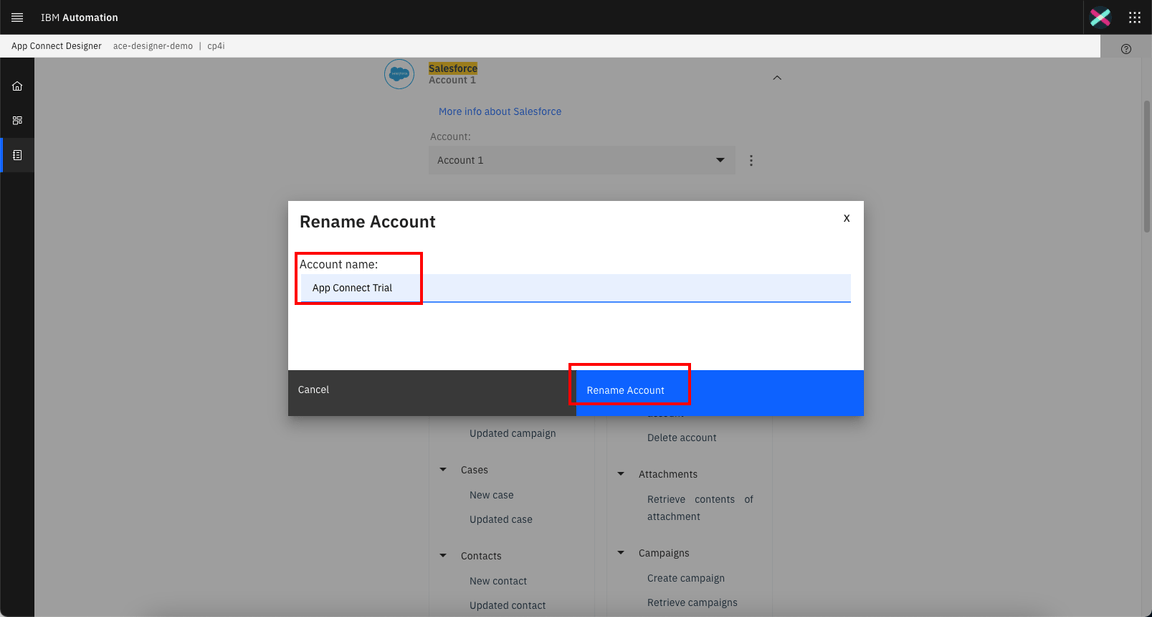
13.Great! However you need to rename this account too. Click on menu and select Rename account.
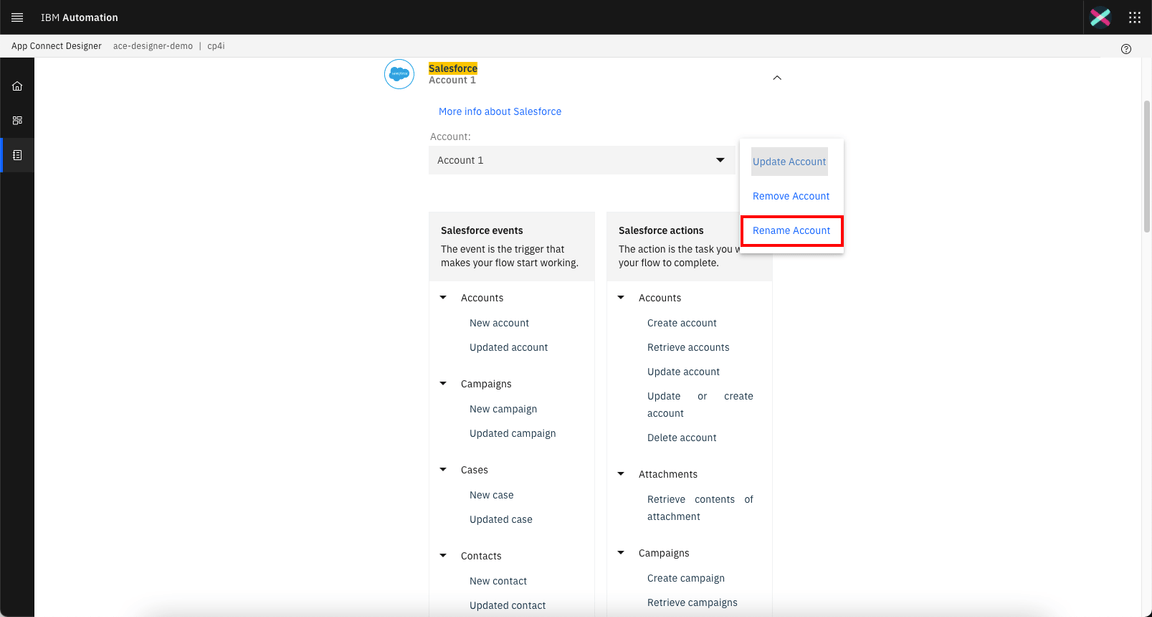
14.Enter App Connect Trial as account name and click Rename Account.
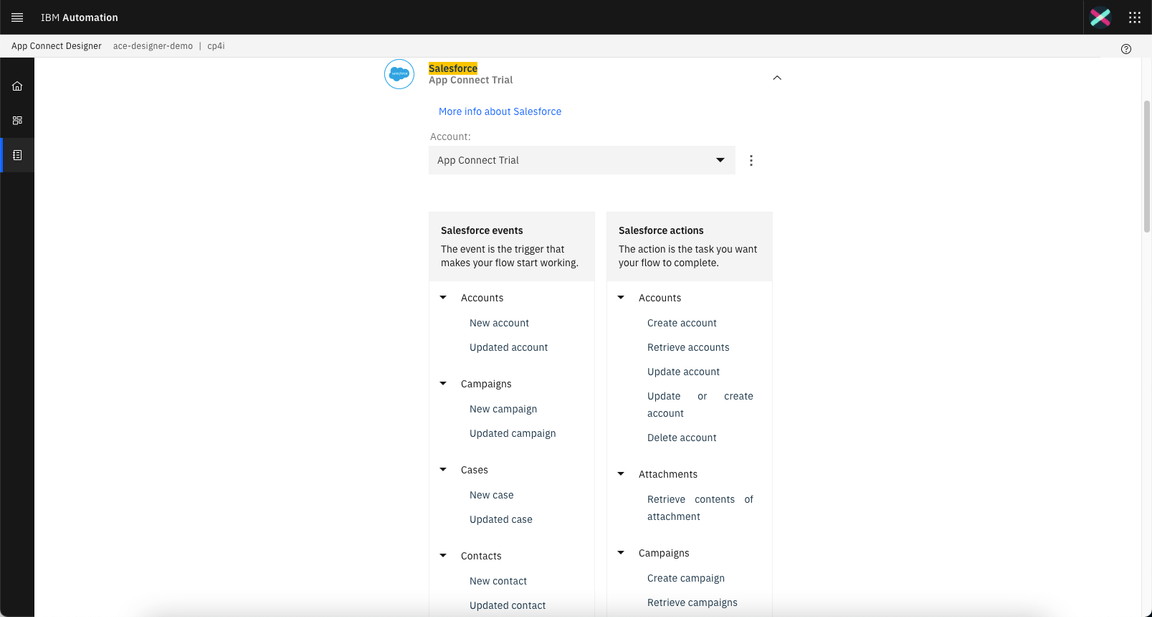
15.Great! Your environment is ready to demo!
Now, let’s create our Portal Developer user.
Creating Portal Dev User
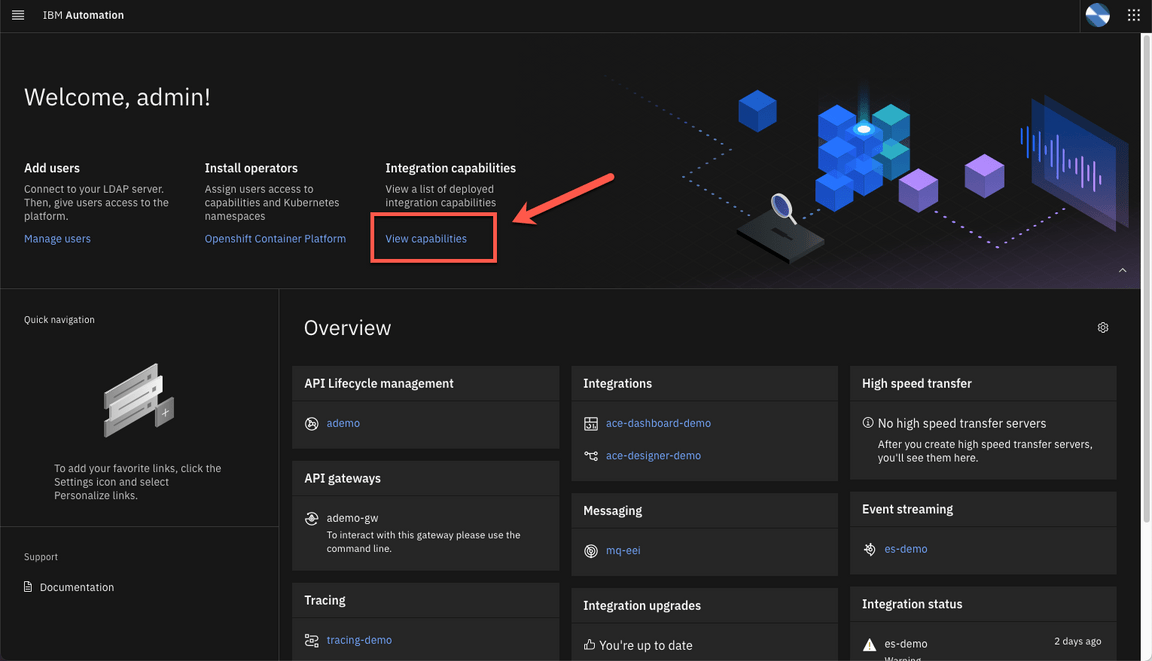
1.First, let’s check if the e-mail server is configured. Back to CP4I Home page, click View capabilities.
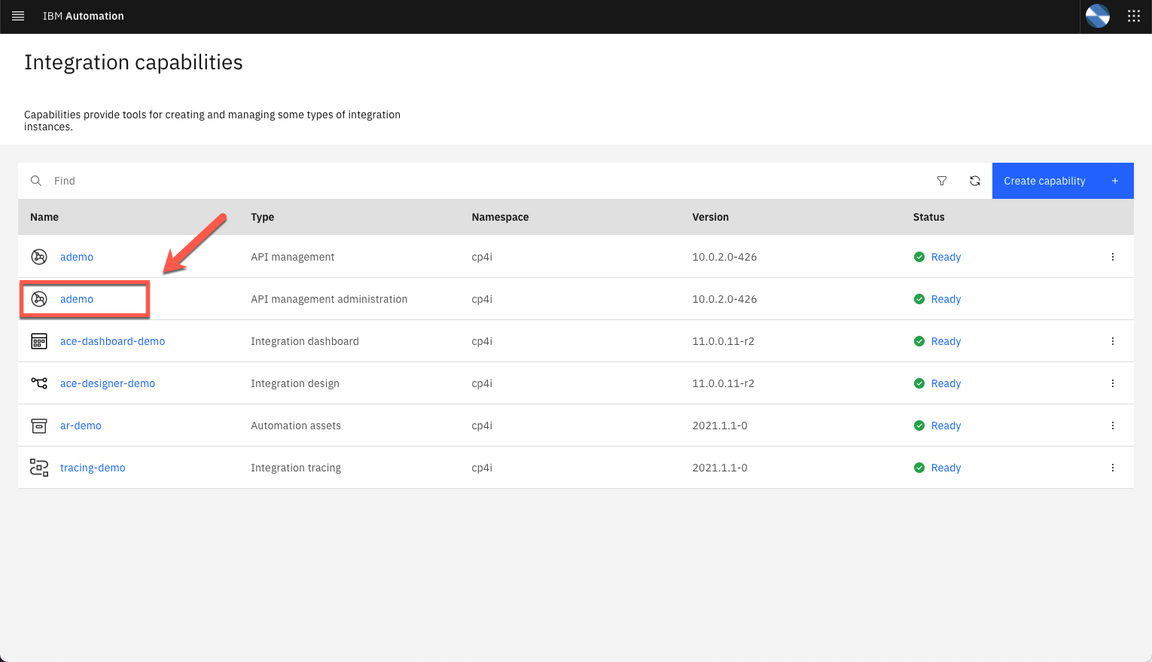
2.Open API management admninistration.
3.If necessary log in again. On Cloud Manager Home page, click Resources icon on the left menu.
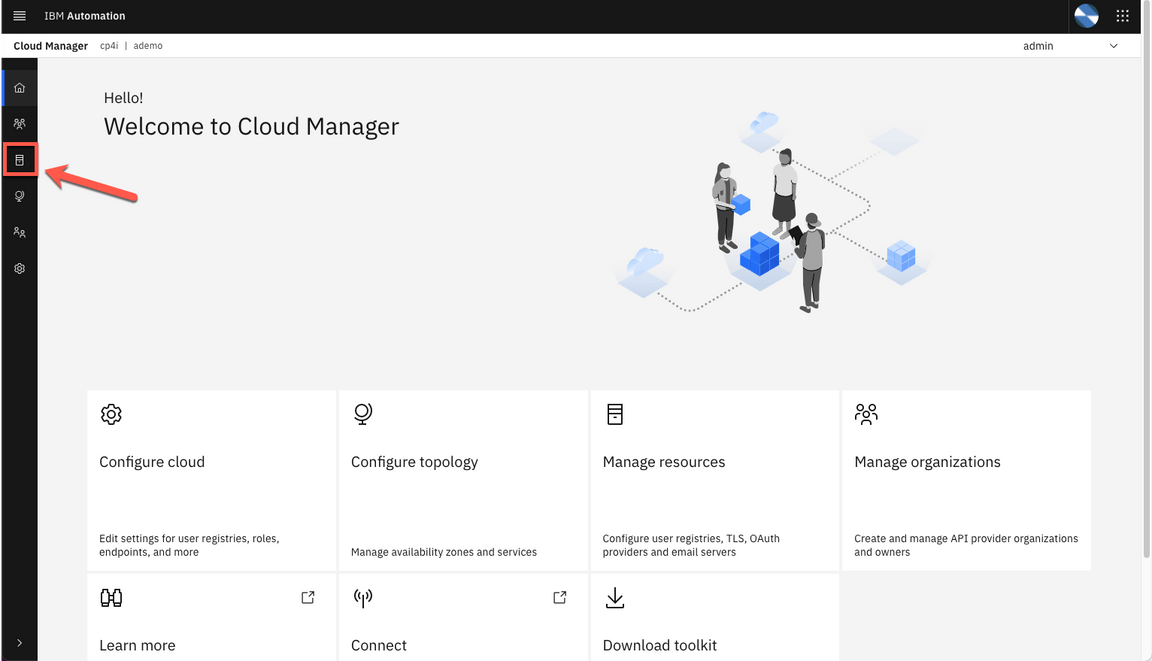
4.On the Notifications tab, open the Default Mail Server.
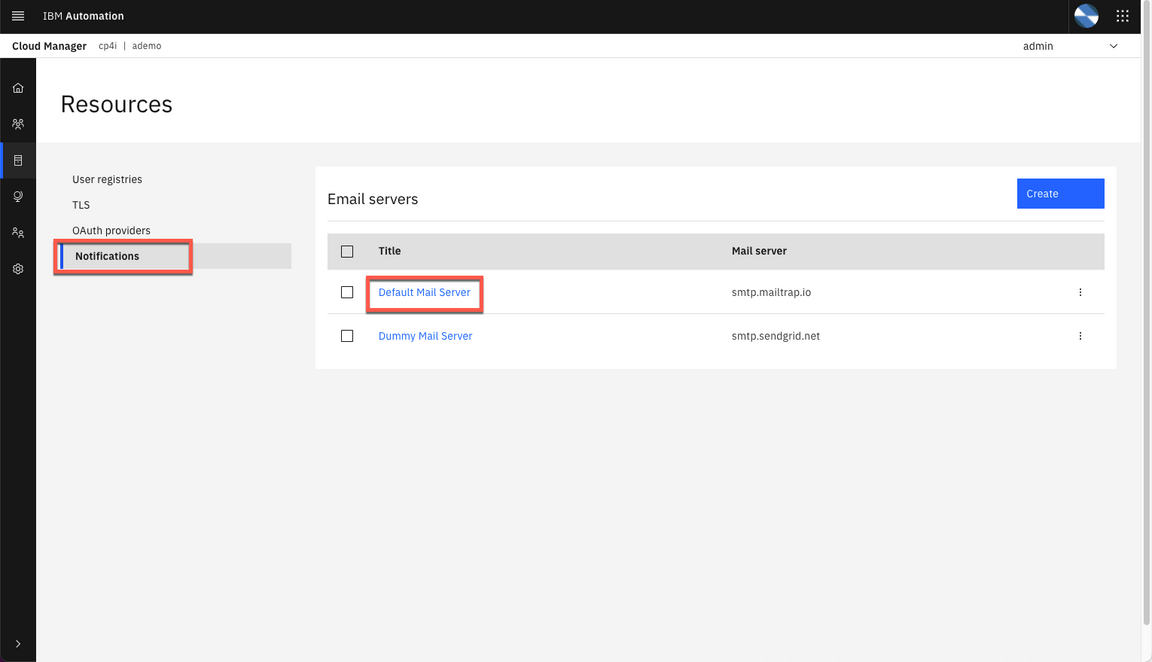
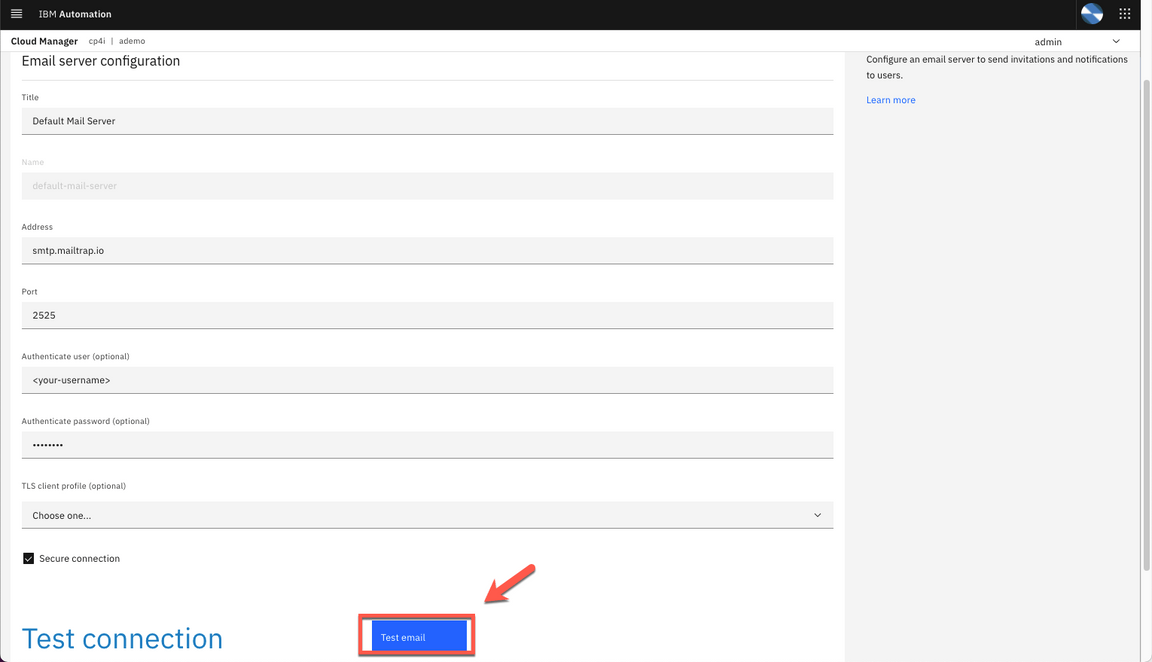
5.Here you can check if your e-mail server is configured. If necessary, feel free to change the email server configuration. If you want to test it, scroll down and click Test email.
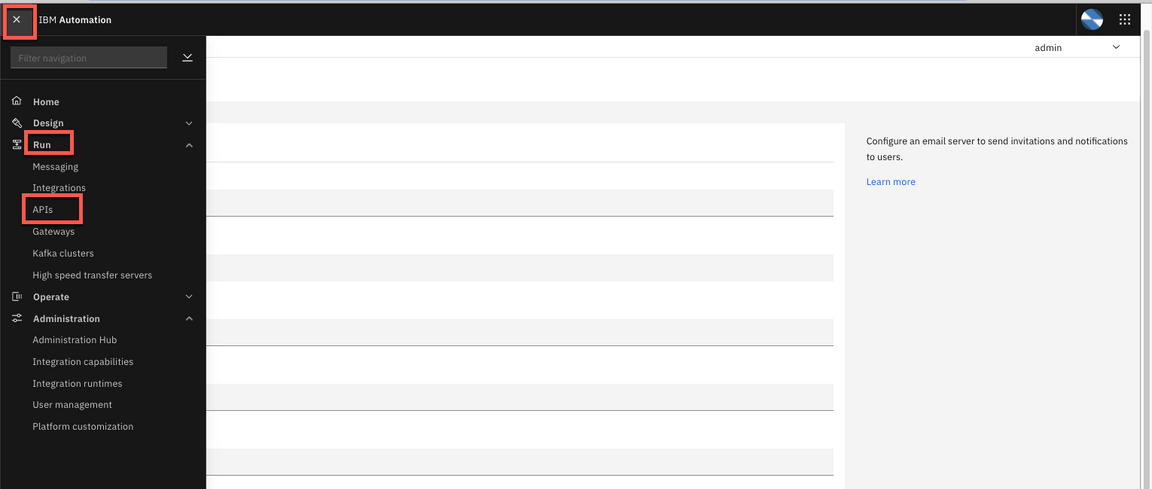
6.Great, your e-mail server is ready to submit notifications. Now, let’s create our Portal Dev User. Open the top left Menu and go to Run > APIs.
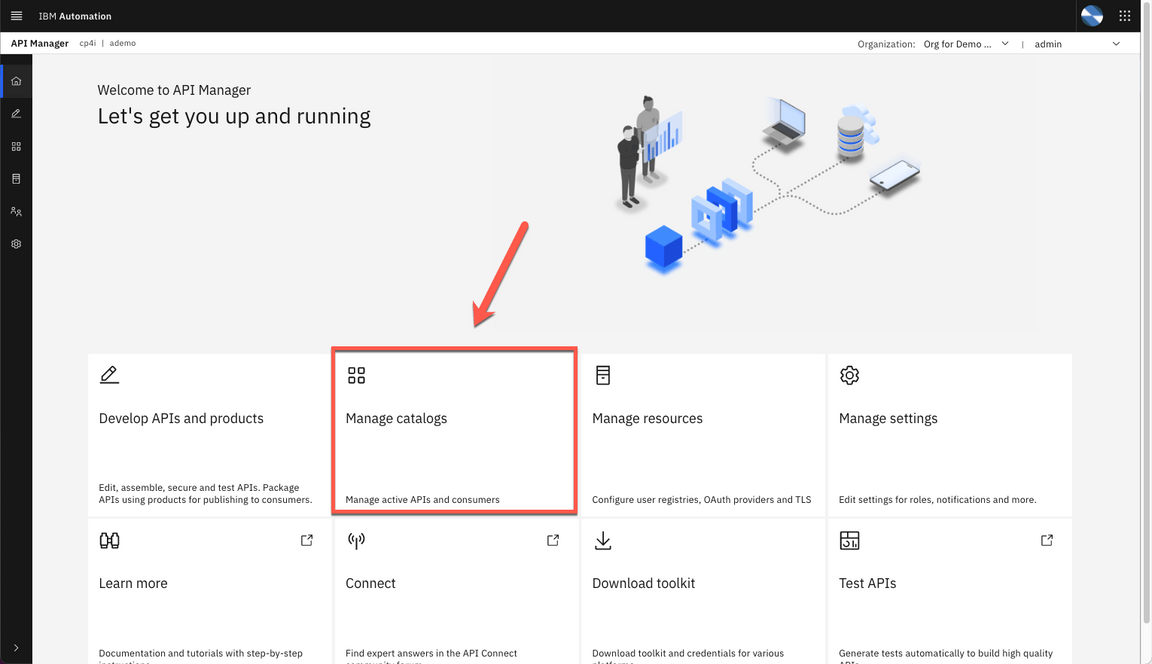
7.Click Manage catalogs.
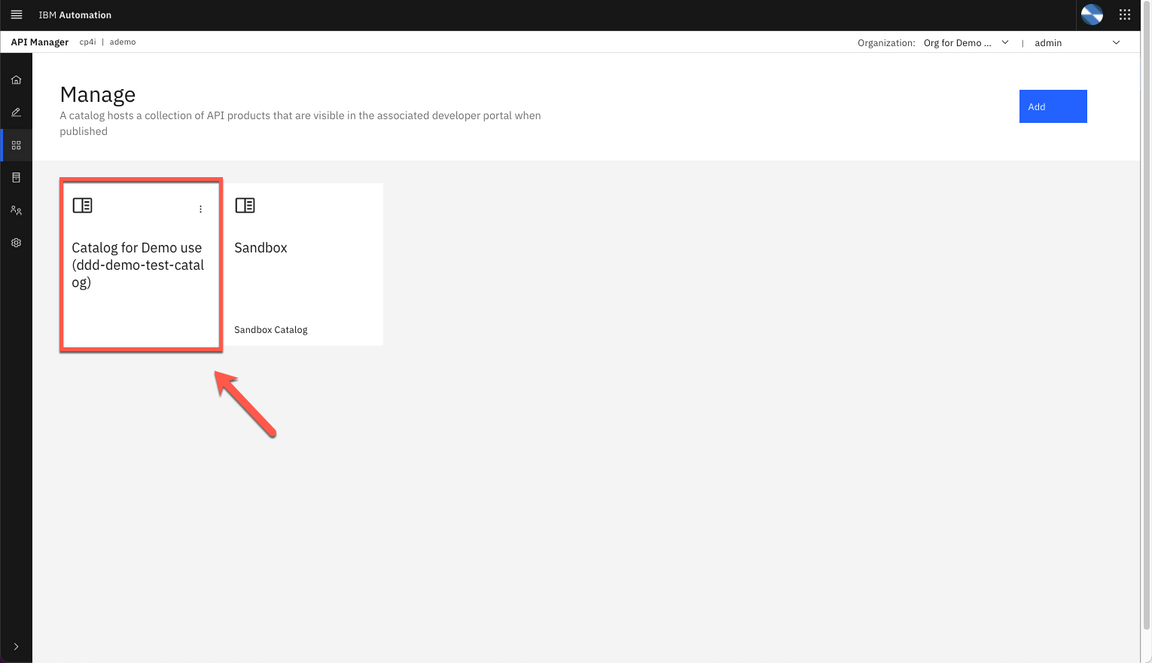
8.Open Catalog for Demo use.
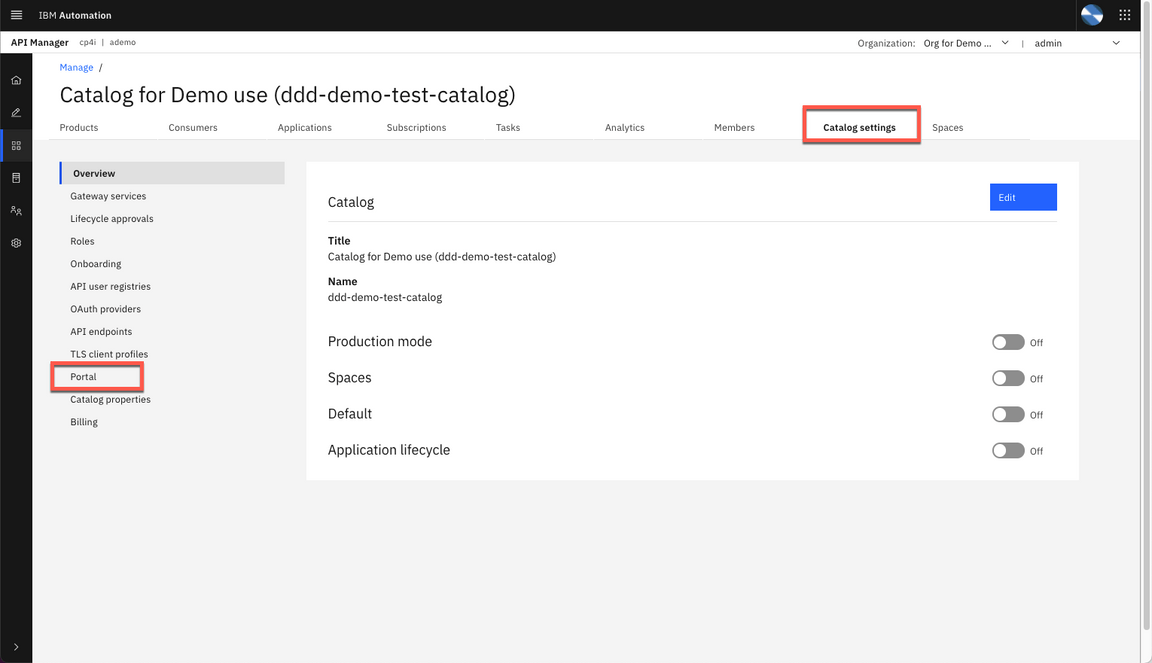
9.Open Catalog settings > Portal.
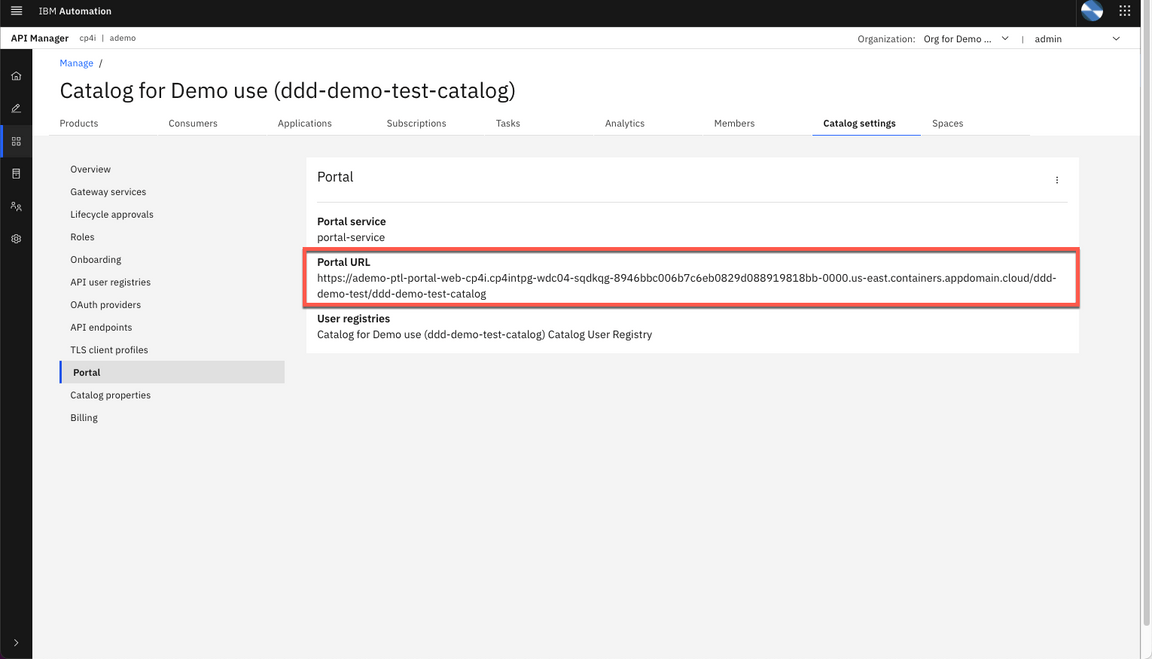
10.Here you can see, your Portal URL. Open a new browser tab, and paste your Portal URL.
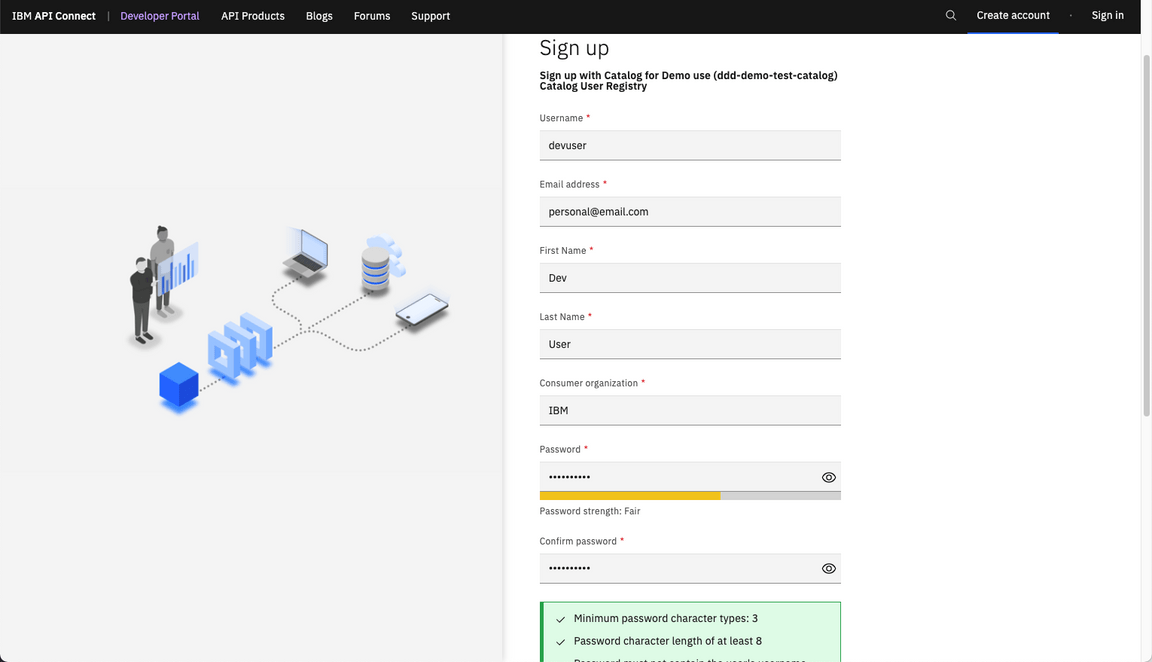
11.On the Portal page, click Create account.

12.Go ahead and complete the form. A suggestion is to use devuser as username, and you are welcome to use your personal email address.
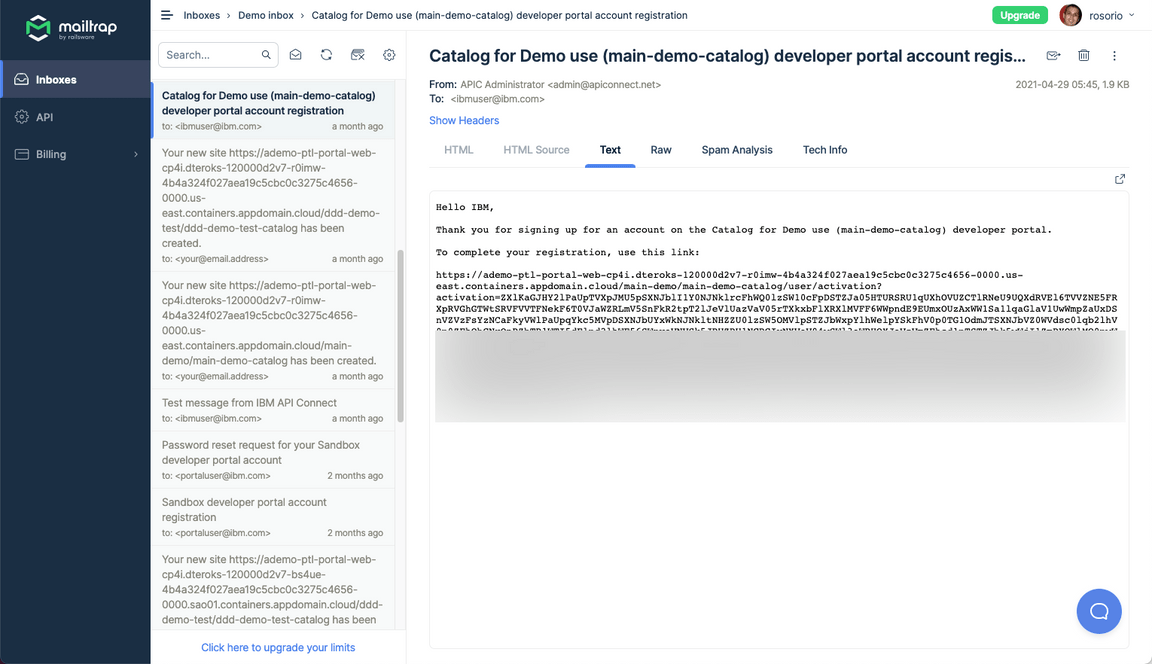
13.To complete your registration, you need to open your email and accept the registration. Note: if you are using mailtrap, you need to open your mailtrop inbox and accept the registration.
 .
.
Congratulations, your portal developer user is created and ready for demo. Now, let’s copy some test script to be used during the demonstration.
Cloning the Demo Scripts
To simplify the tests during our demo, there is a pre-created script to consume our APIs. Let’s copy it.
Note: To copy the script, you will need to have the Git CLI in your machine. If you don’t have it, follow the installation steps described in this page, based in your operational system.
1.Open your terminal window and execute the command below.
git clone https://github.com/cp4i-demo/cognitive-api.git
2.Open the cognitive-api folder.
cd cognitive-api
3.Here you see 4 files. 00-variables file specifies the variables that point to the API, you will change it during the demo script after you create the API. car.jpg is the car image that will be submitted during the demo. exportVariables.sh is the script to export environment variables. demotestcar.sh is the demo script. To execute our script files, we need to change the file permission to be able to execute them.
chmod 755 *
Great! Your demo script is ready to the demo. Now, it is time to learn how to deliver the demo, by exploring the 300 Demo Script document.
