Getting Started with IBM Cloud Pak for Integration on ROKS
IBM Cloud Pak for Integration brings together IBM’s market-leading middleware capabilities to support a broad range of integration styles and use cases. With powerful deployment, lifecycle management, and production services running on Red Hat OpenShift, it enables clients to leverage the latest agile integration practices, simplify the management of their integration architecture, and reduce cost. Getting started with Cloud Pak for Integration (CP4I) on Red Hat OpenShift Kubernetes Service (ROKS) on IBM Cloud has never been easier with one-click install. The following guide walks you through how to deploy Cloud Pak Integration on ROKS cluster.
You will complete the following high level tasks:
Create a ROKS cluster in IBM Cloud
Cloud Pak for Integration ROKS cluster can be provisioned from IBMDemos for demo purposes, self-learning or Proof of Concept projects. If you have not already provisioned a cluster, follow these steps.
1.Access the IBM Tech Zone site and log in using your IBM credentials.
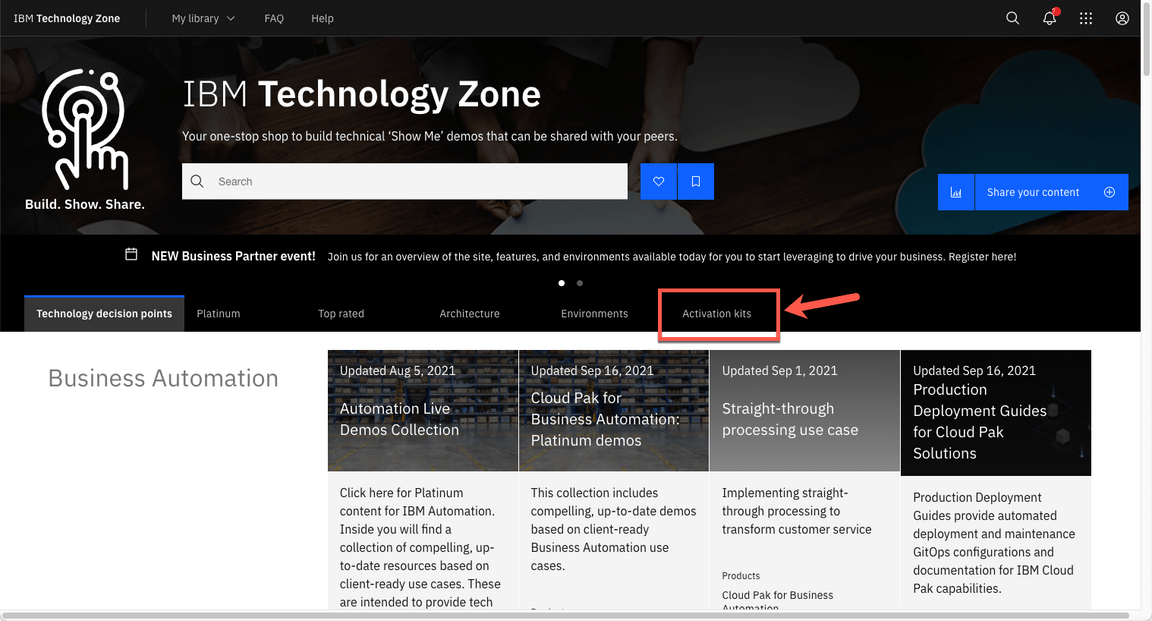
2.On the home page, open the Activation Kit tab.
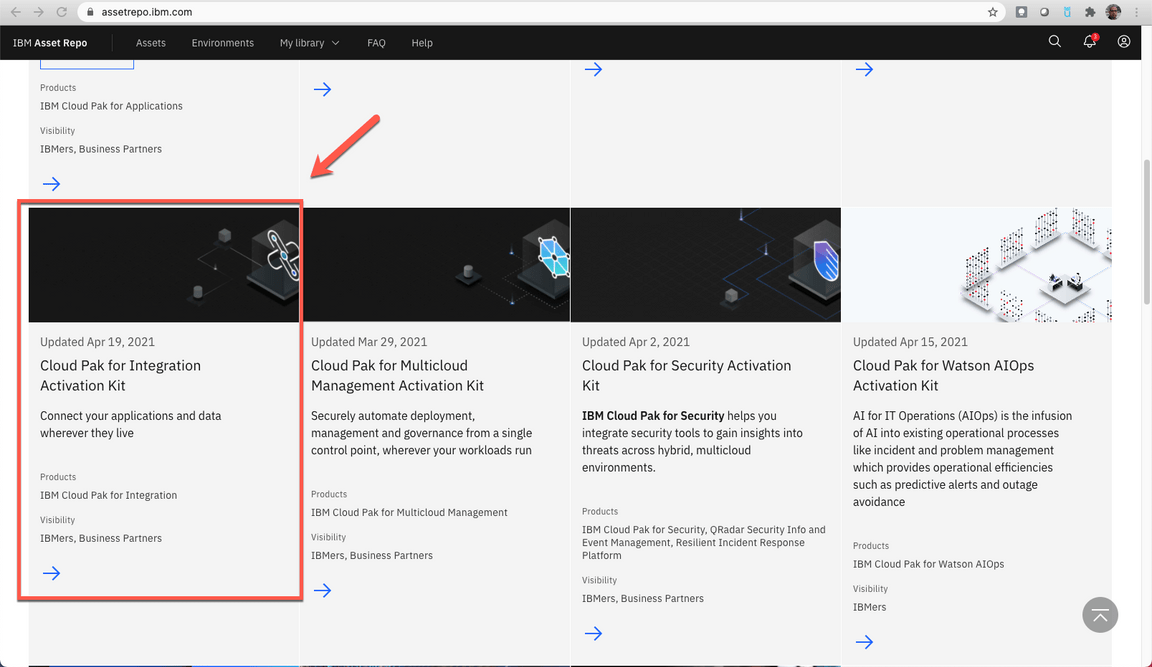
3.Open the Cloud Pak for Integration Activation Kit.
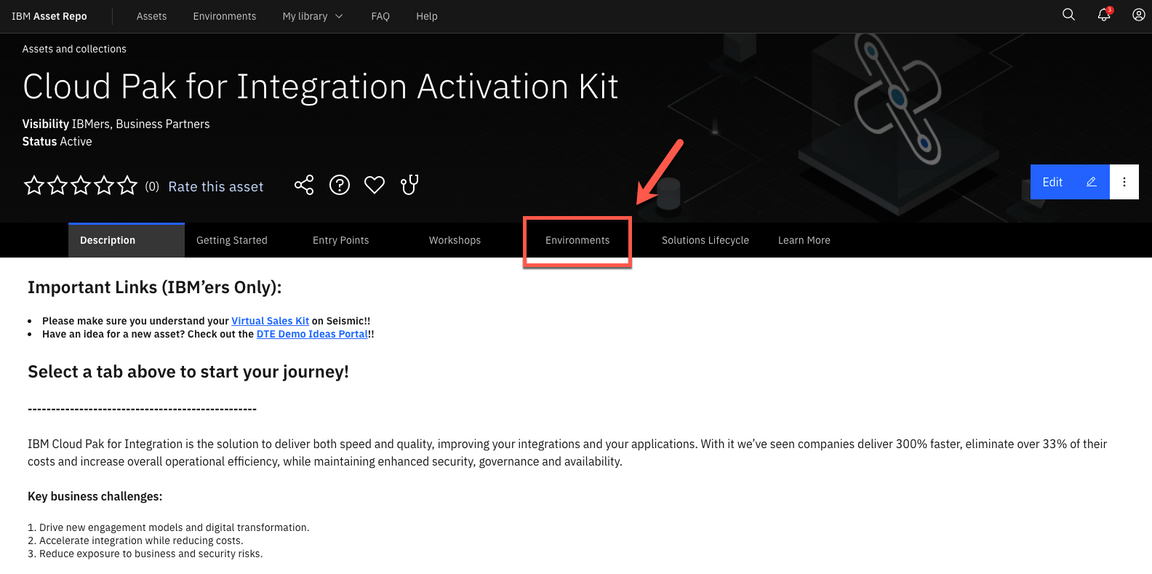
4.Open the Environments tab.
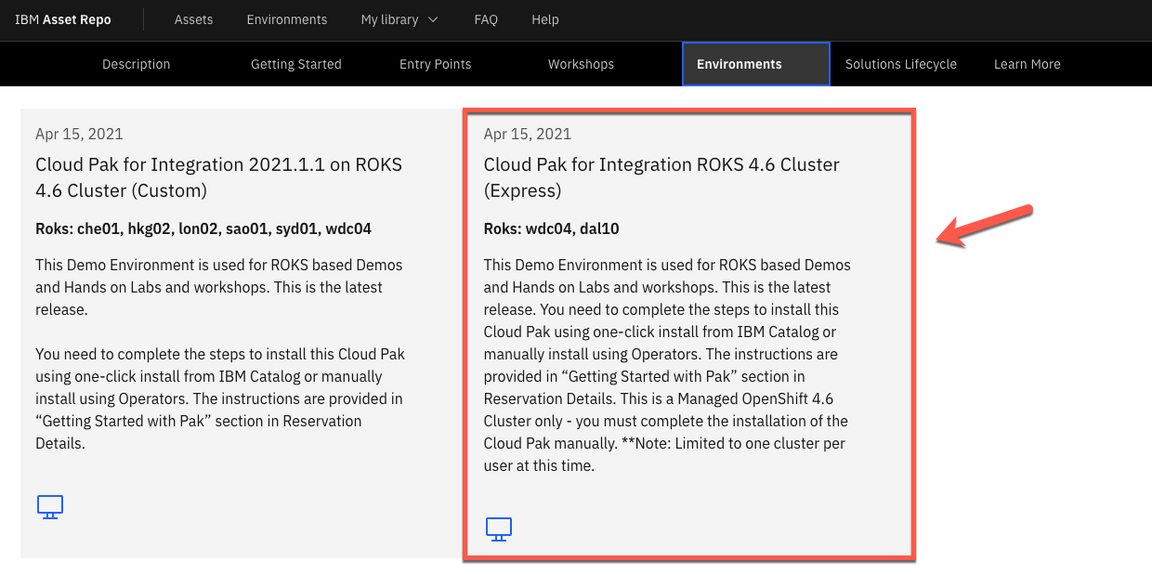
5.Select the ROKS cluster that you want (the simplest way is to select the latest version of the Express instalation).
6.Follow the Create a reservation form to define the details of your ROKS Reservation.
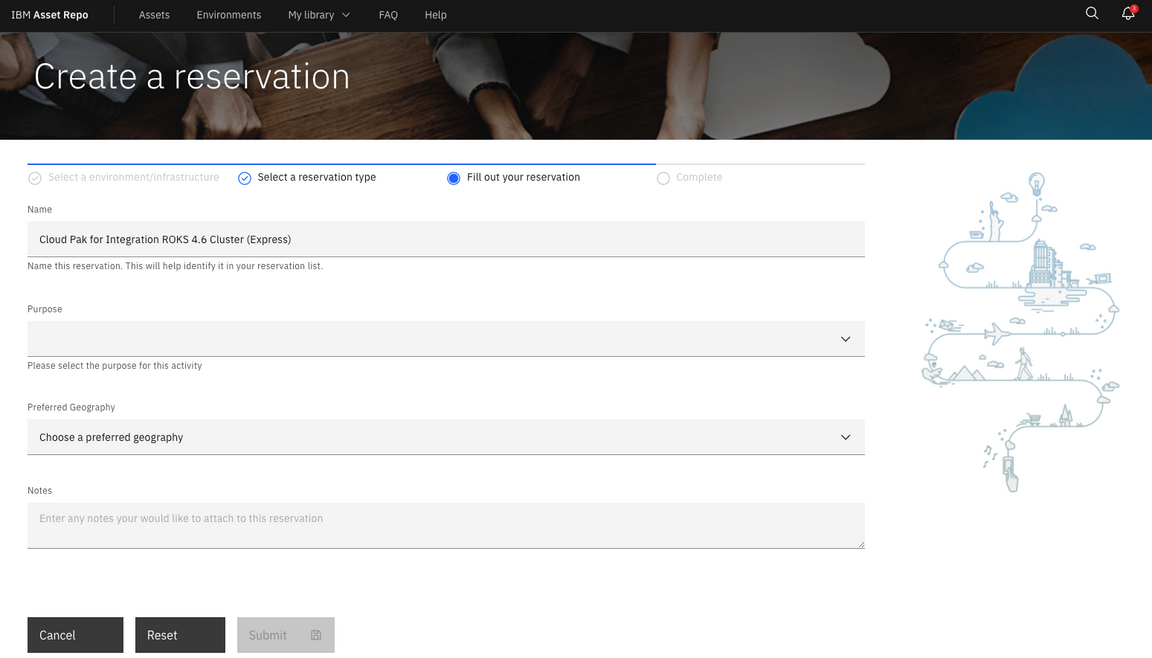
Note: If you have any problem in Express instalation about No Cluster available, go ahead with the Custom instalation (the process is the same, however Express is a 5 minute request, because you will receive a pre-created ROKS cluster from a queue, and custom is a 2 hour provisioning, because the ROKS cluster will be installed, behind the scenes, from scratch for you).
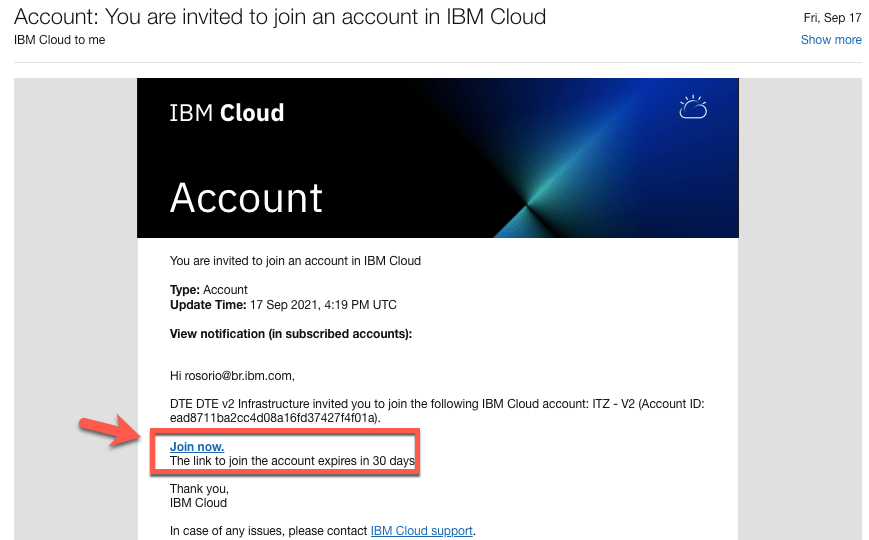
7.After few minutes, your ROKS environment is ready. If it is the first time that you are requesting a ROKS environment, you will receive an email to accept the invitation to join the ITZ IBM cloud account. Open the email, click Join now and follow the steps to accept the invitation. Your new cluster is available in this ITZ account, take note of the account name, you will use it later to install CP4I.
Now you are ready to move to the next step and install Cloud Pak for Integration!
Install Cloud Pak for Integration on ROKS cluster
1.Login to https://cloud.ibm.com/catalog if have not already
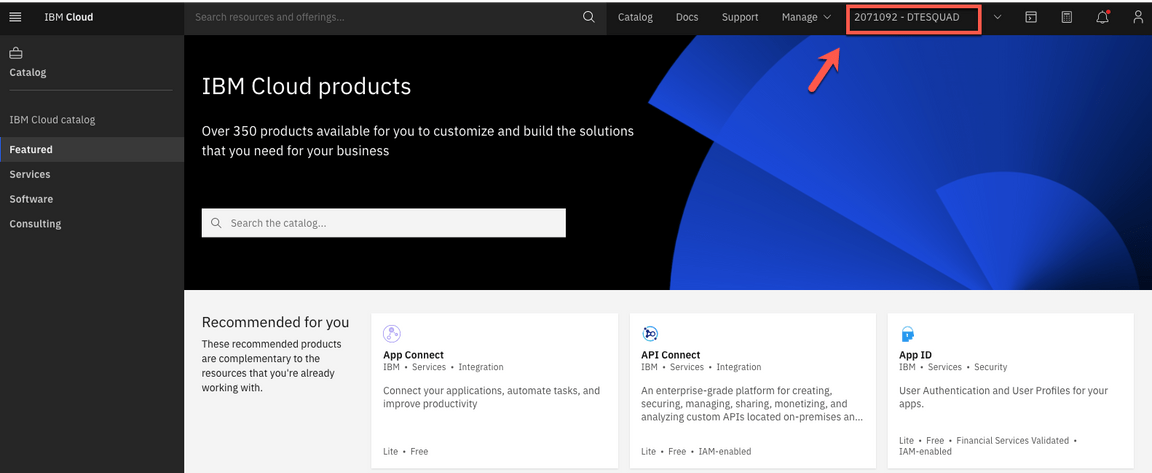
2.Confirm that you are using the ITZ account.
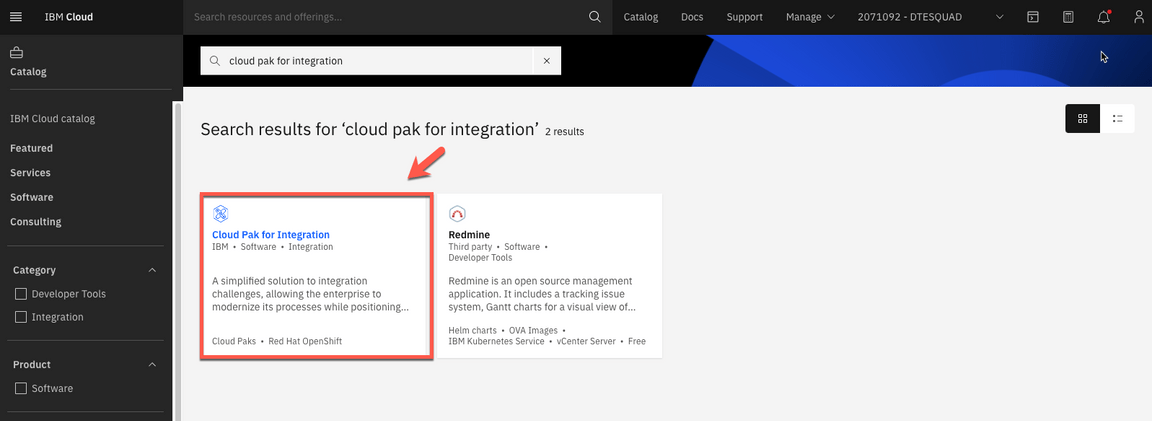
3.From the Catalog, select Cloud Pak for Integration
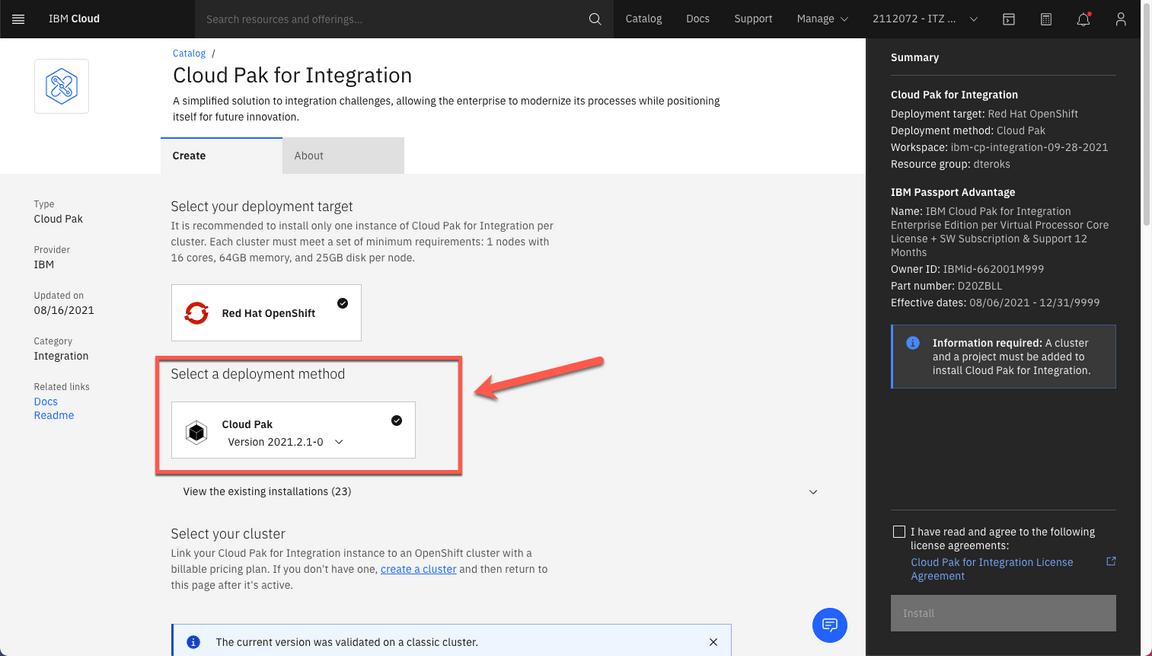
4.On Select a deployment method, go ahead and select the version of Cloud Pak for Integration that you want/need to install. Some demos are ready for a specific version of Pak, please check in the demo page what the version is necessary.
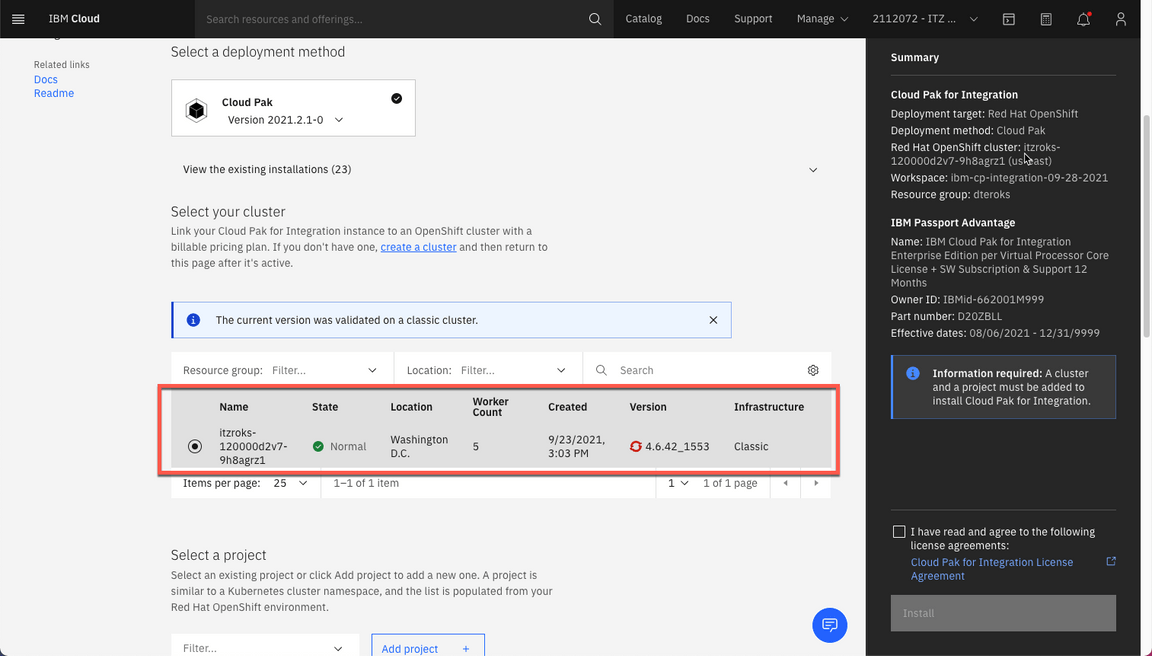
5.Scroll down the page, and you should see the Select your cluster section. Select the Redhat Openshift Cluster that you just created from the list.
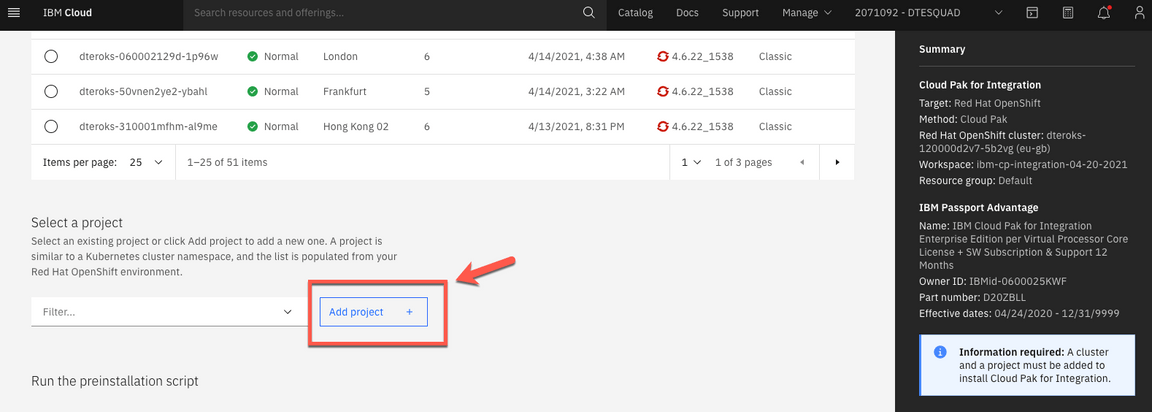
6.Click Add project Enter a project name, and a tag name to identify your cluster.
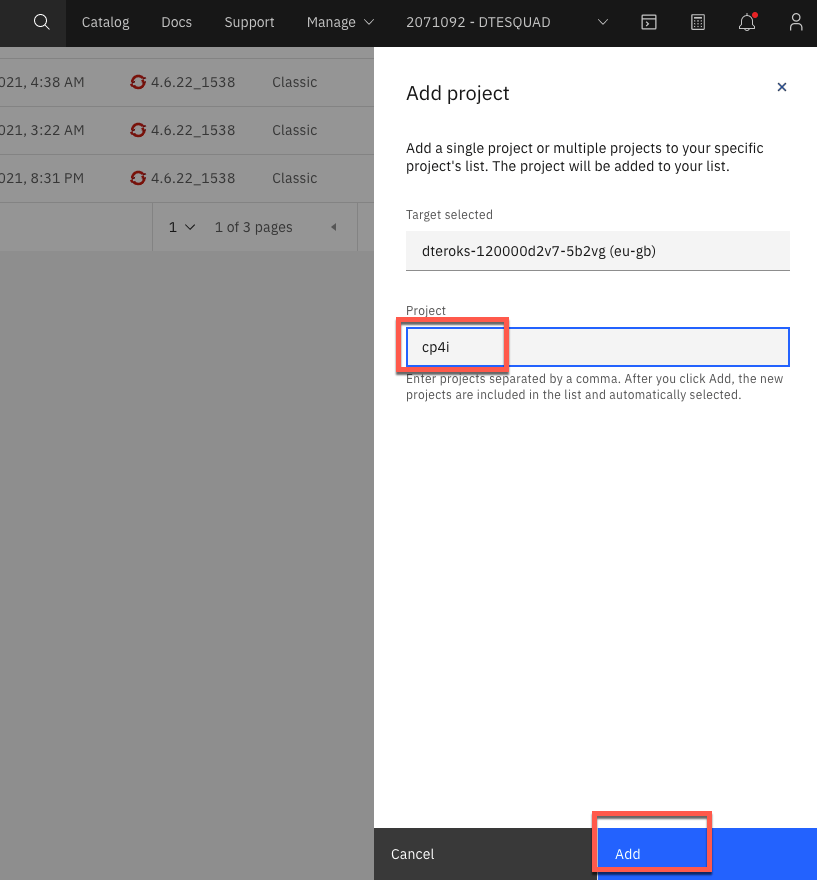
7.Enter cp4i as Project name and click Add.
8.Scroll down. On Set the deployment values section. Unmark the Use an existing secret? to define a new password and enter a value for csDefaultAdminPassword. It is important that you choose a password that is 32 characters in length and it conforms to the password rule - number, letter, -.
Note: Currently password validation is not enforced on this page. If you proceed with an invalid password you will be able to start the installation but it will fail. There is no way to recover from this error other than provisioning a new cluster.

9.Scroll down to see ‘Parameters with default values’ and click on the ‘twisty’ to open them. There is no need to change the default values except for the parameters that start with demo.
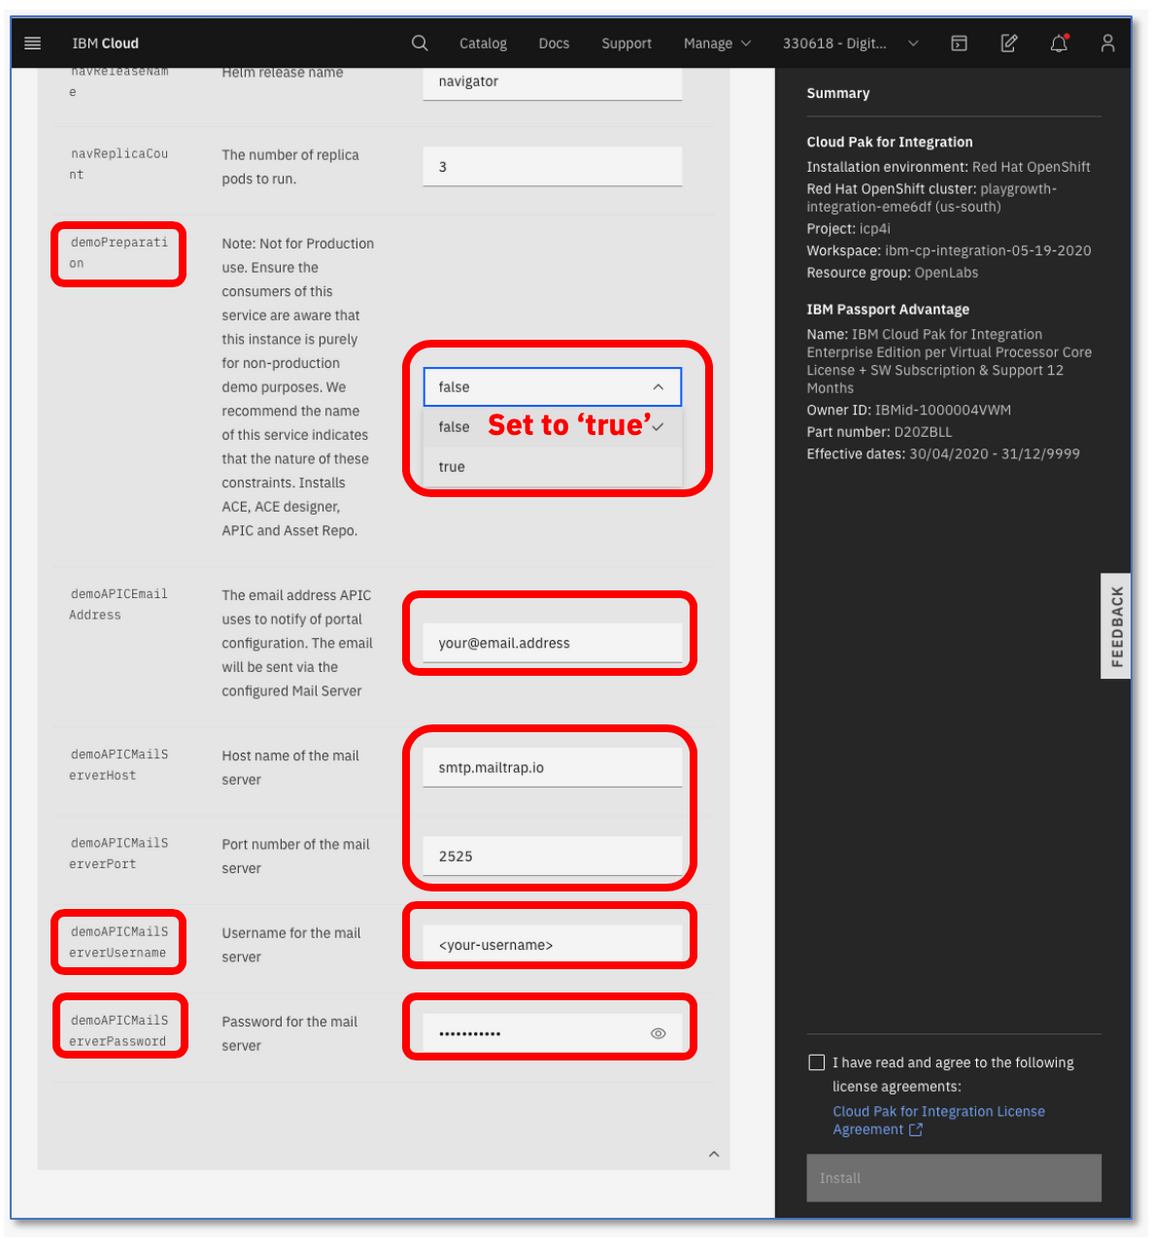
If you do have an SMTP email server and accounts that you can use, you may sign up for a free mailtrap.io account using https://mailtrap.io. Mailtrap.io is a free cloud service that mimics an SMTP server. It is used for development/demonstration purposes only.
Fill in the following fields:
demoPreparation: Set to ‘true’
demoAPICEmailAddress: if you’re using mailtrap.io, use any email address. Use ’apicadmin@example.com’ to be safe — example.com is guaranteed to not be a real domain. If you’re using your own mail server, use an email address that you can receive and read.
demoAPICMailServerPort: if you’re using mailtrap, leave this as 2525
demoAPICMialServerUsername: Set this to your mailtrap username.
demoAPICMailServerPassword: Set this to your mailtrap password.
10.Accept the license agreement and click Install to install Cloud Pak for Integration. The installation will take up to 90 minutes.

11.You can view the progress in the Schematics progress bar or check the details in view log.
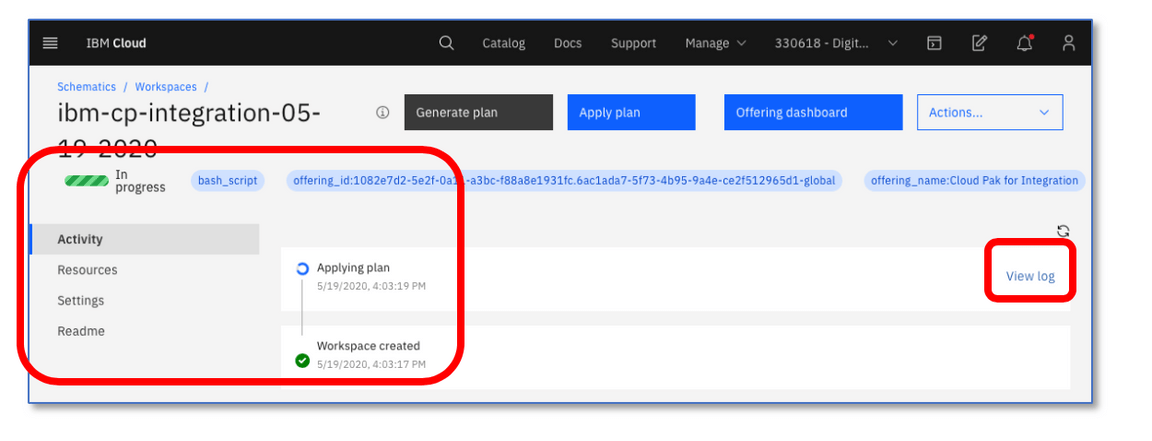
12.When you see the Active status, you will be able to access Cloud Pak for Integration Platform Navigator by selecting Offering Dashboard on the upper right corner of the page.

You can also get to the platform navigator page from a browser by manually entering cpd-cp4i.<yourcluster-domain-name>. Your cluster domain is shown in the Details section in Reserved Instances.
12.On Log in page, select the authentication type IBM provided credentials (admin only).
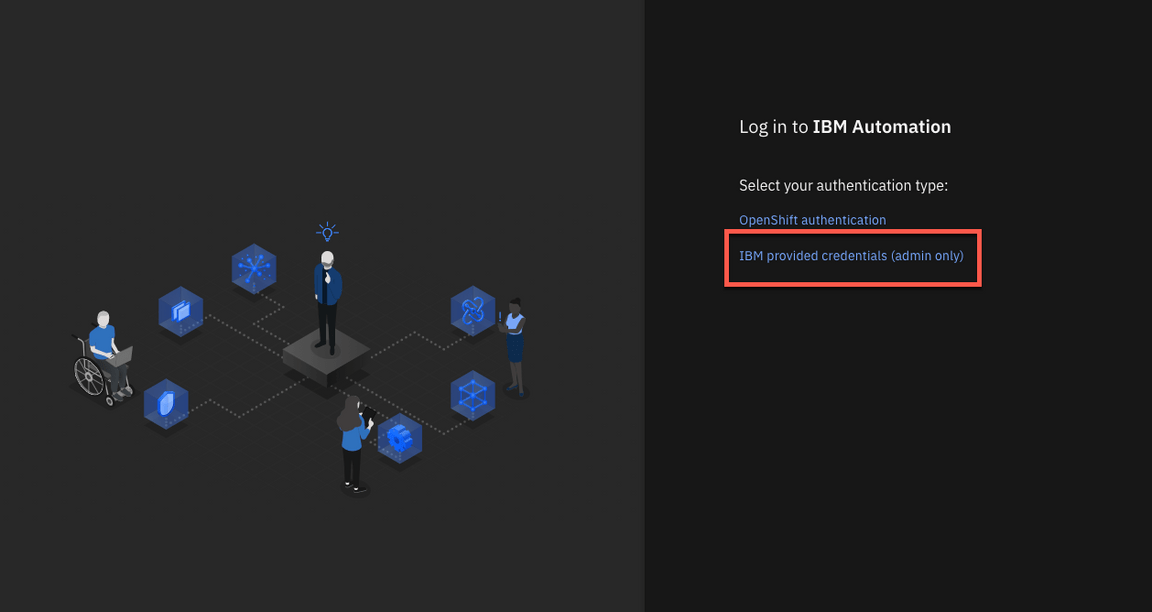
13.Log in with your admin user and password.

14.Click on View capabilities.
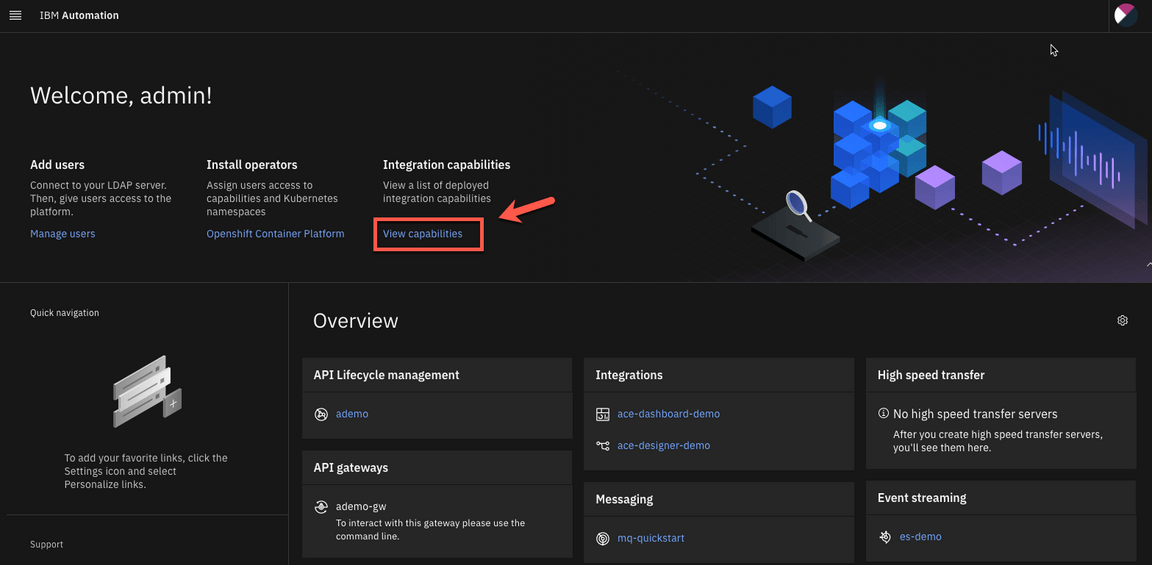
15.Here you are able to view the instances for API Connect, App Connect Designer, App Connect Dashboard and Asset Repository. Additional instances for any of the Integration Capabilities can be created by selecting Create capabilities.

You have successfully completed cluster provisioning, Cloud Pak for Integration installation and deployment of API Connect and App Connect. You are ready to proceed to Sales Demos or CP4I Labs that are supported on Cloud Pak for Integration on ROKS.