APIC Dev Jam Lab 4 - Use Lifecycle Controls to Version your API
In the previous lab, you created a new version of the inventory API which is secured with an OAuth 2.0 provider. At this stage, however, the changes are still in draft mode. In order for the changes to take effect, you must publish the APIs to the developer portal and make them available for the API Consumers. Recall though that the inventory 1.0.0 version is already running and has active subscribers.
API lifecycle management capabilities is an essential part of the API Management platform. The API lifecycle includes the following stages:
Plan and design the API.
Develop the API.
Test the API.
Deploy (publish) the API.
Retire and deprecate the API.
In this tutorial, you will explore the following key capabilities:
Creating a new API Product
Replacing the Old Product
Testing Your OAuth API in the Developer Portal
APIC Dev Jam Series
The APIC Dev Jam Series is a hands-on workshop with lab exercises that walk you through designing, publishing, and securing APIs. This workshop is for API developers, architects, and line of business people who want to create a successful API strategy. There are 8 labs and each is 30 minutes long. Make sure you choose enough time in your reservation to get through all the labs!
[NOTE: ][This demo environment contains a full API Connect installation in Cloud Pak for Integration. The login information to the APIC cluster will be sent in a separate email when you reserve the instance. Use Google Chrome, Firefox or Microsoft Edge to access the cluster using the credentials supplied. Make sure you login using API Manager User Registry not Common Services registry.]
Prerequisites: Labs 1-3
Create A New Product
In IBM API Connect, Plans and APIs are grouped together in Products, with which you can manage the availability and visibility of APIs and Plans. Products allow related APIs to be bundled together for subscribers. In Lab 1, when the inventory microservice application was generated, it also created a default product. In this section, you will create a new product from scratch and stage it to your API Manager environment.
The following link provides more information about API Products in IBM API Connect:
Go to the [Develop] tab in your API Connect manager interface.
Click [Add] and select [Product.]
Click [New product] and then click [[Next.]]
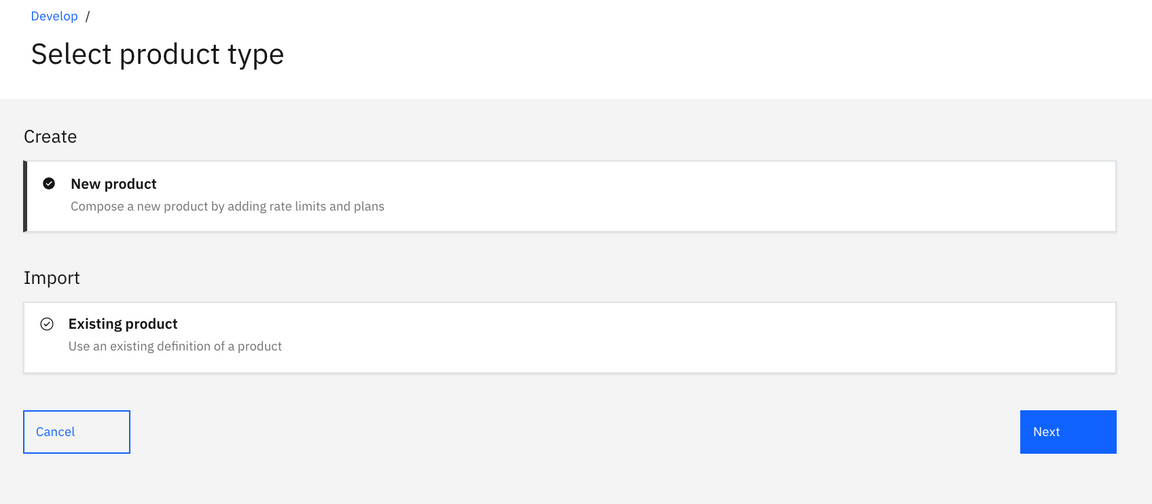
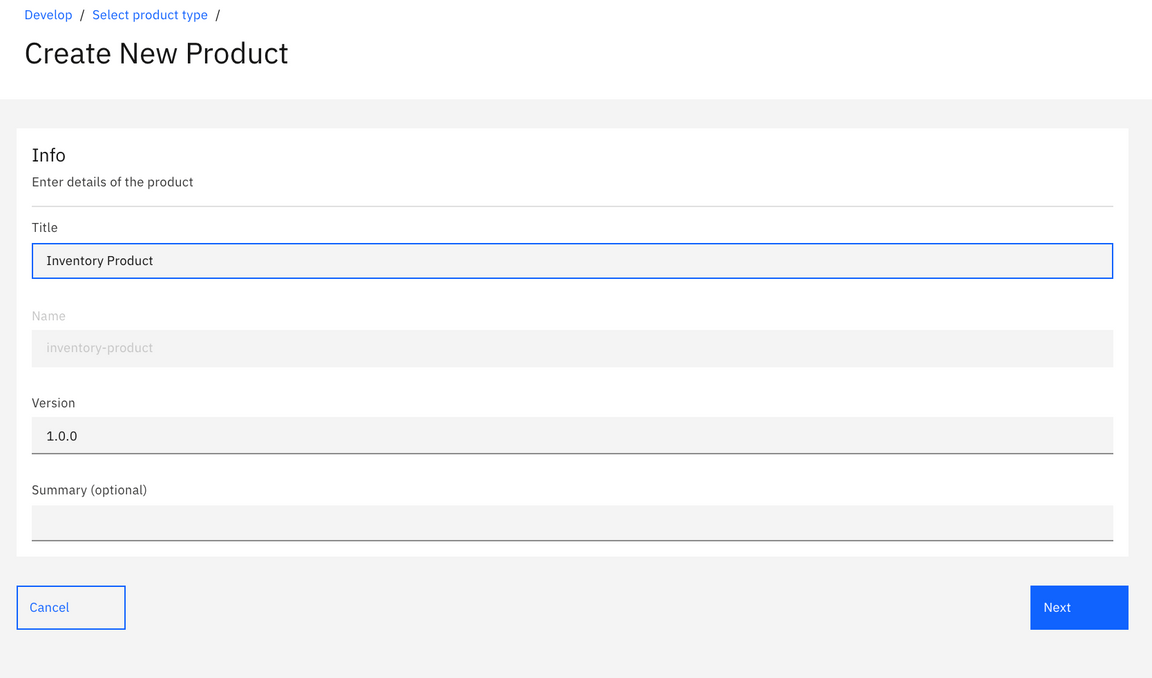
Title this product [[Inventory Products]] and click [[Next.]]
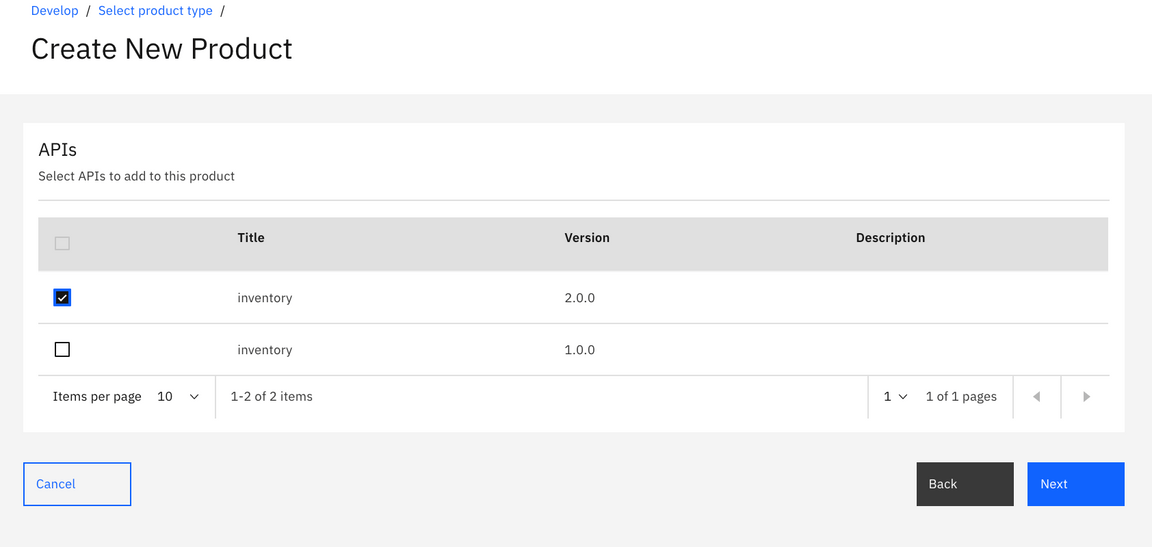
Select the [[inventory 2.0.0 API]], then click [Next].
Add the [Default Plan] to your product and then click [Next.]
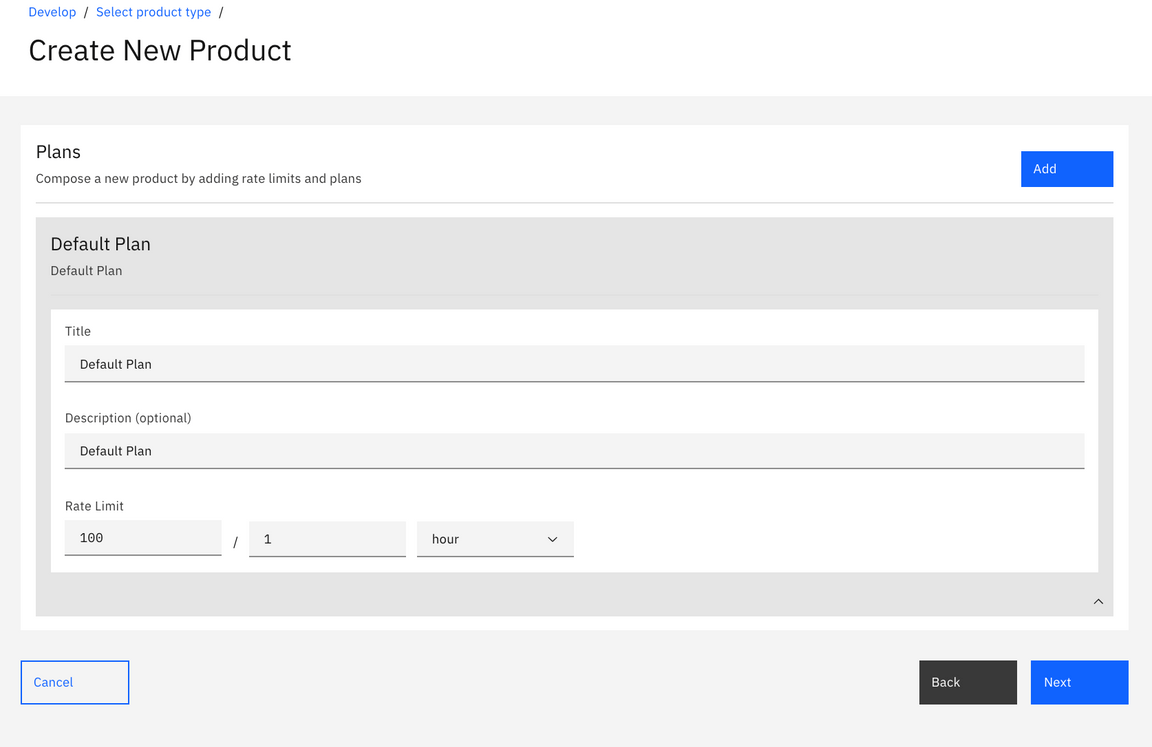
Keep the default settings and click [Next.]
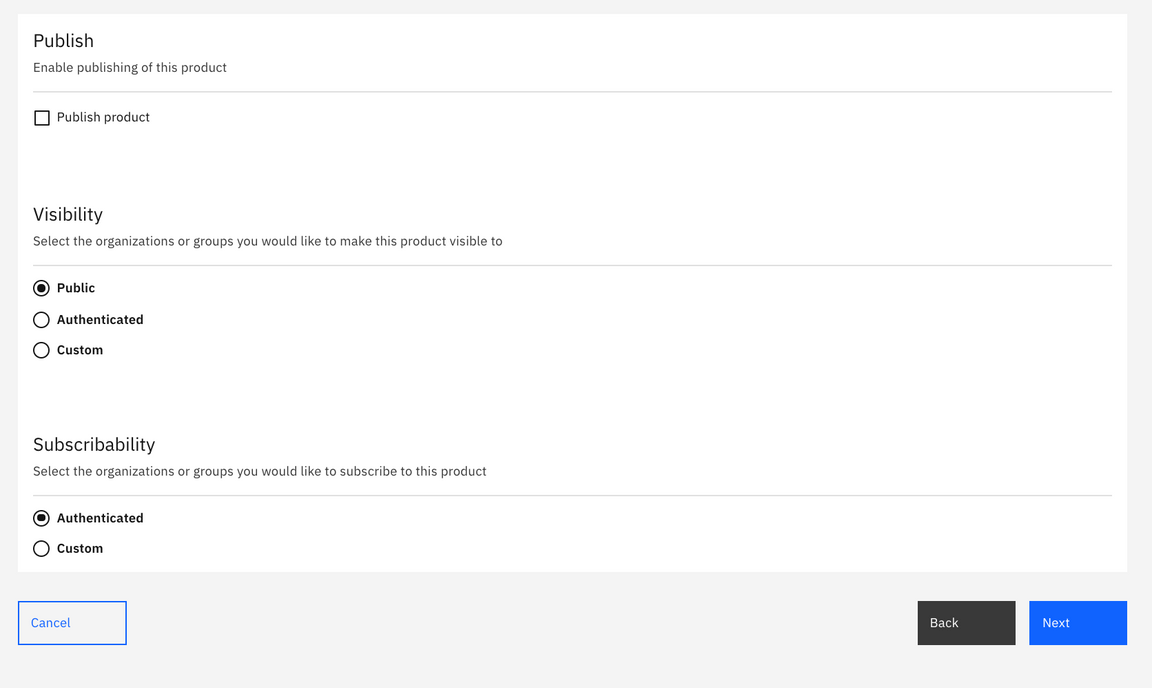
Your product will be created and associated with the required object such as APIs and Plans.
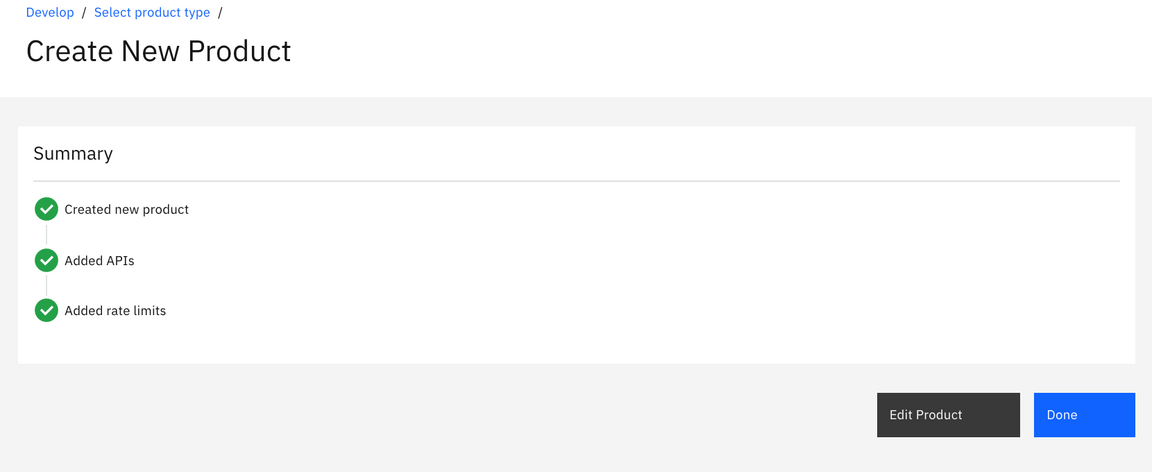
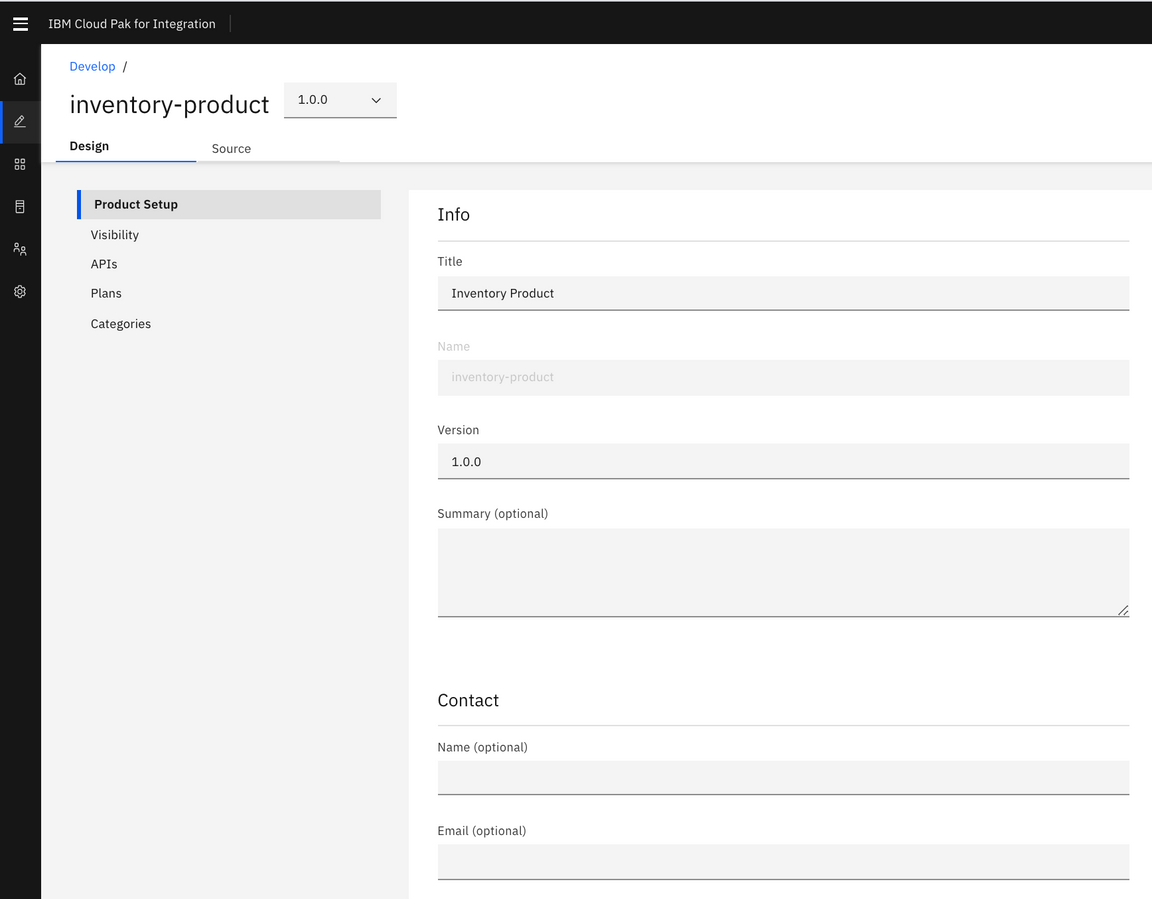
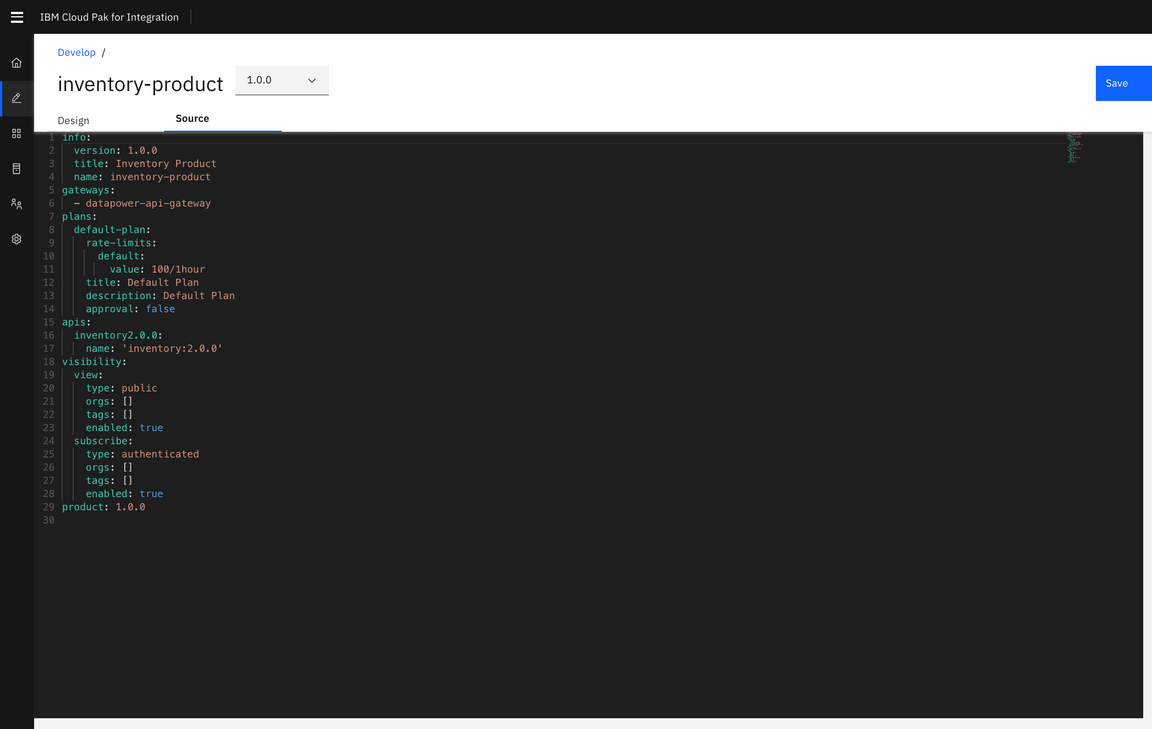
Click [Edit Product]. You may want to browse across other sections of the *API Product* menu such as *Visibility*, *Plans*, and *Categories* to explore additional API Product management capabilities provided by IBM API Connect. Based on the information provided, API Connect will generate a yaml definition of your API Product. You can check it by clicking on the [Source] button at the top.
Stage the Product to your API Manager environment
Before an API Product can be published, you must first stage that Product to a Catalog. When a Product is in the staged state, it is not yet visible to, or subscribable by developers. However, it can be reviewed by the API Product Manager and Published once it is decided that the API Product is ready to be consumed.
If you stage a Product to a Catalog, editing and then restaging that Product through the Products tab of API Designer or API Manager will affect changes to the staged version.
In the API Manager, from the main menu on the left, click [Develop].
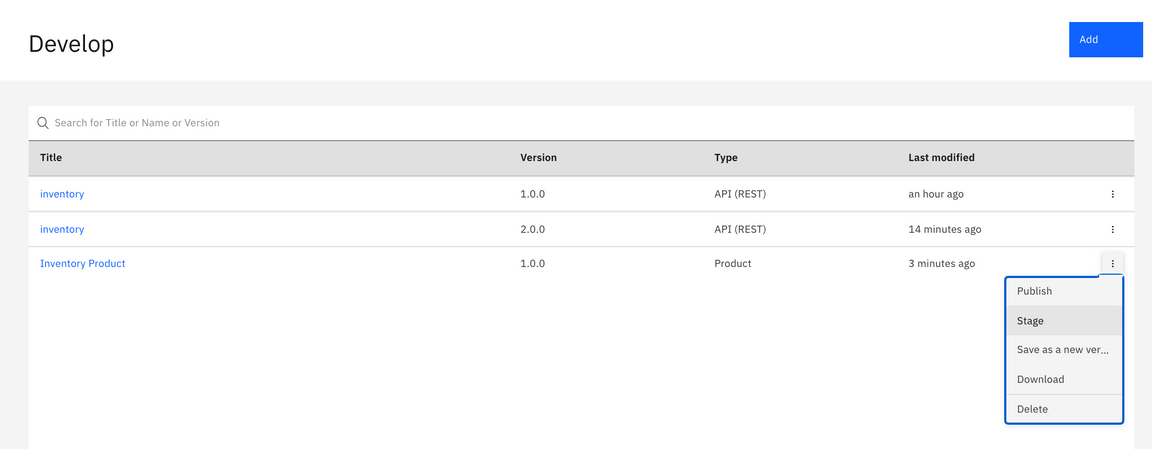
Click the [⋮] button next to your API Product and [Stage] it.
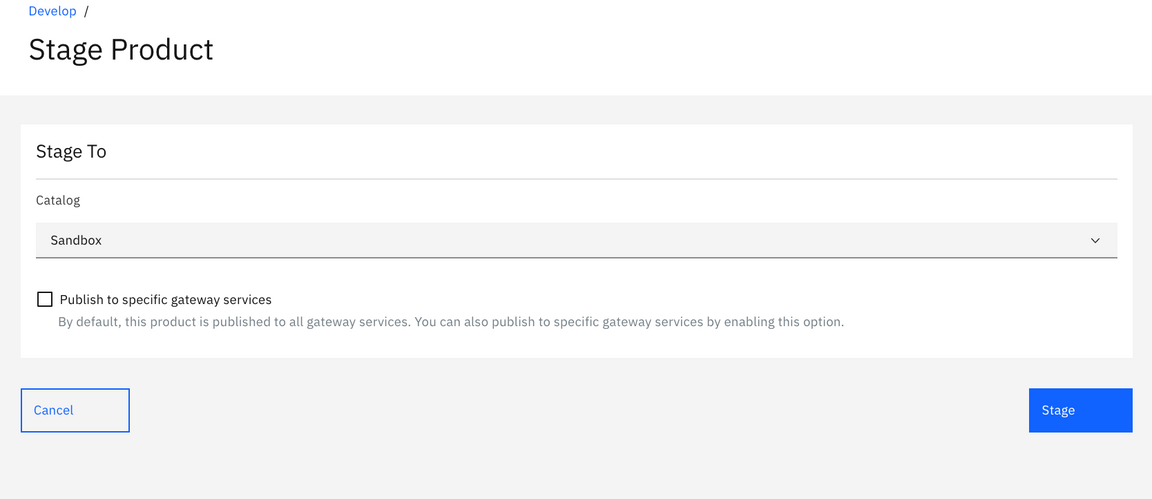
Choose your [Sandbox] catalog as a target for Staging.
Note:
IBM API Connect allows you to publish products to specific gateways associated with the Catalog.
Supersede the Old Product
IBM API Connect provides capabilities for managing the lifecycle of your API Products. There are various states which an API Product can reside in, as well as controls around when you can move an API Product from one state to another. In this section, you will explore how to replace a running version of an API Product with a new one.
Switch to the [Manage] tab of the interface and click on your [Sandbox] catalog tile.
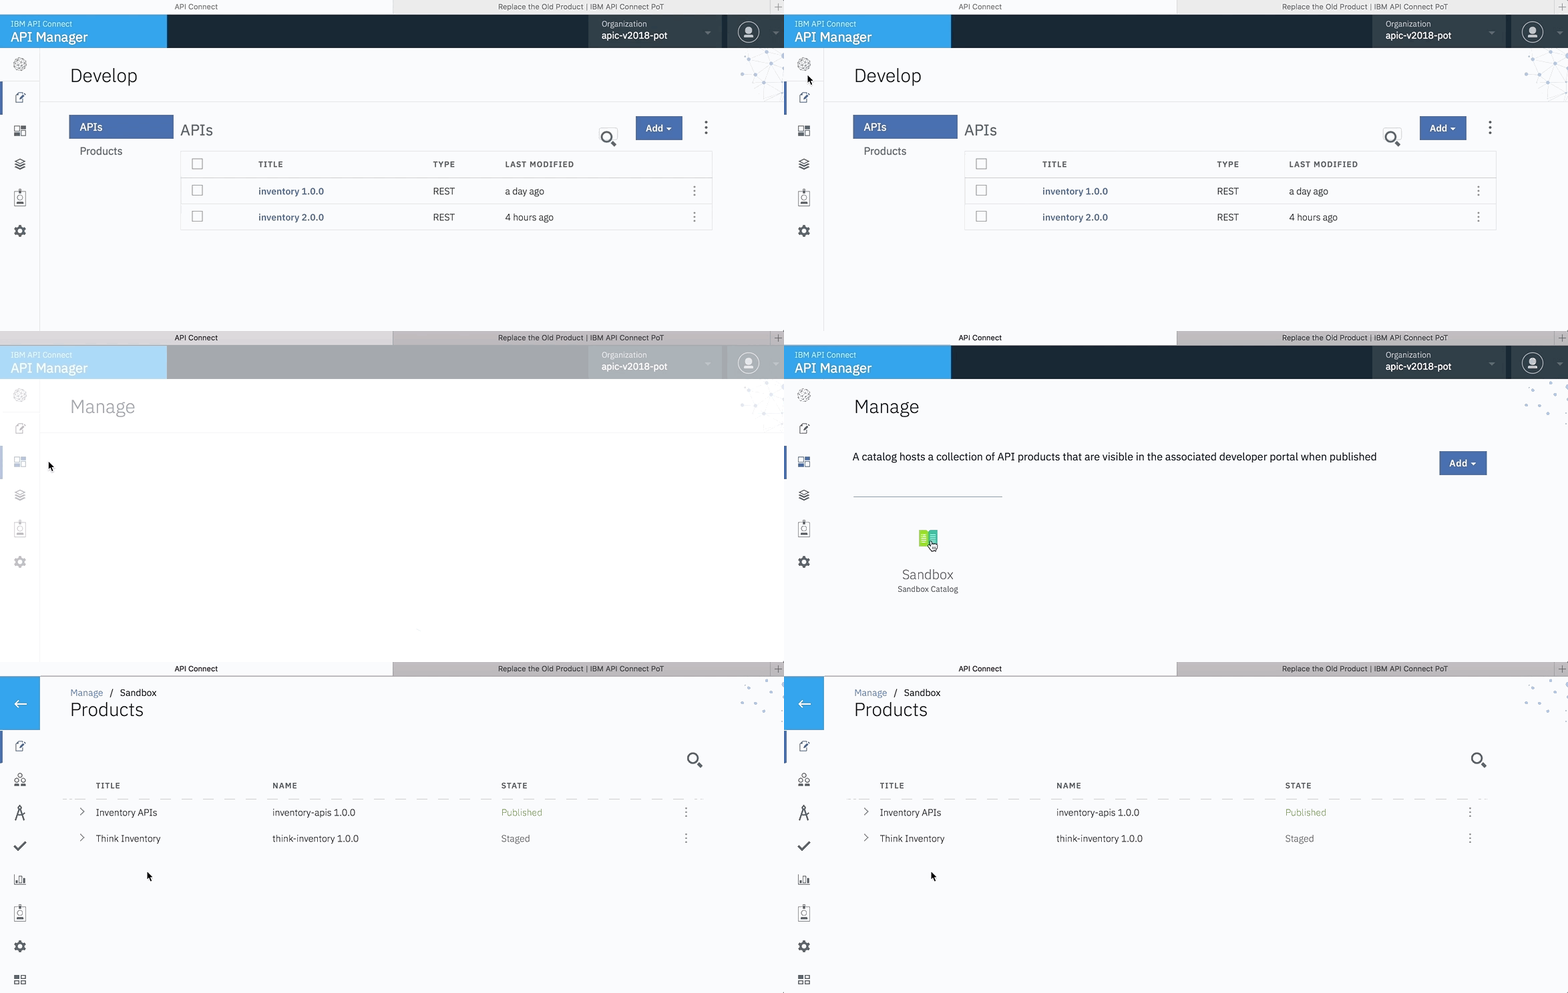
The [Products tab] will list all of the API Products that this Catalog is currently managing.
Make sure your newly created API Product [Inventory Products] is in the [Staged] status while the old [Inventory APIs] product is [Published] in the Catalog.

- Click on the menu options for the [Inventory APIs] product and select the [Supersede] option.

Select the [Inventory Products] product, as this is the one which will supersede Inventory APIs .
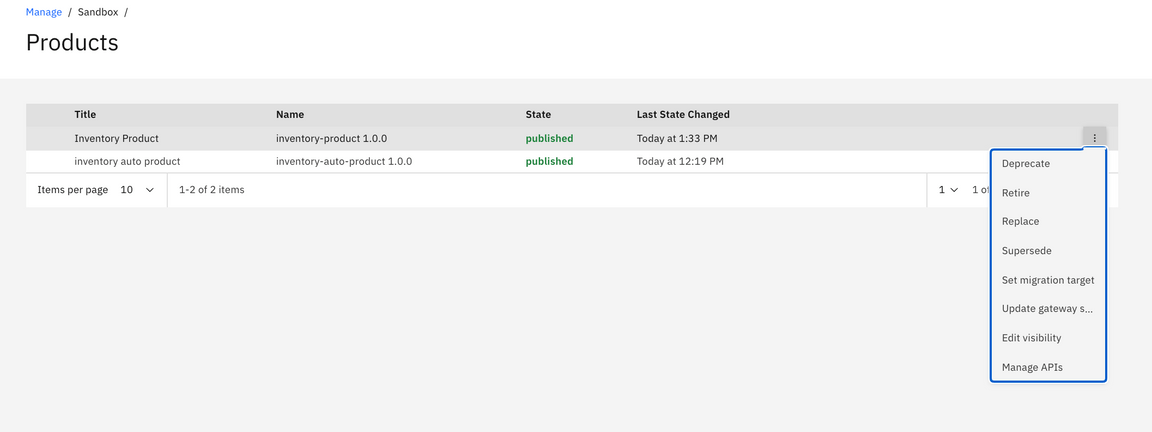
Click [Next] in the bottom.
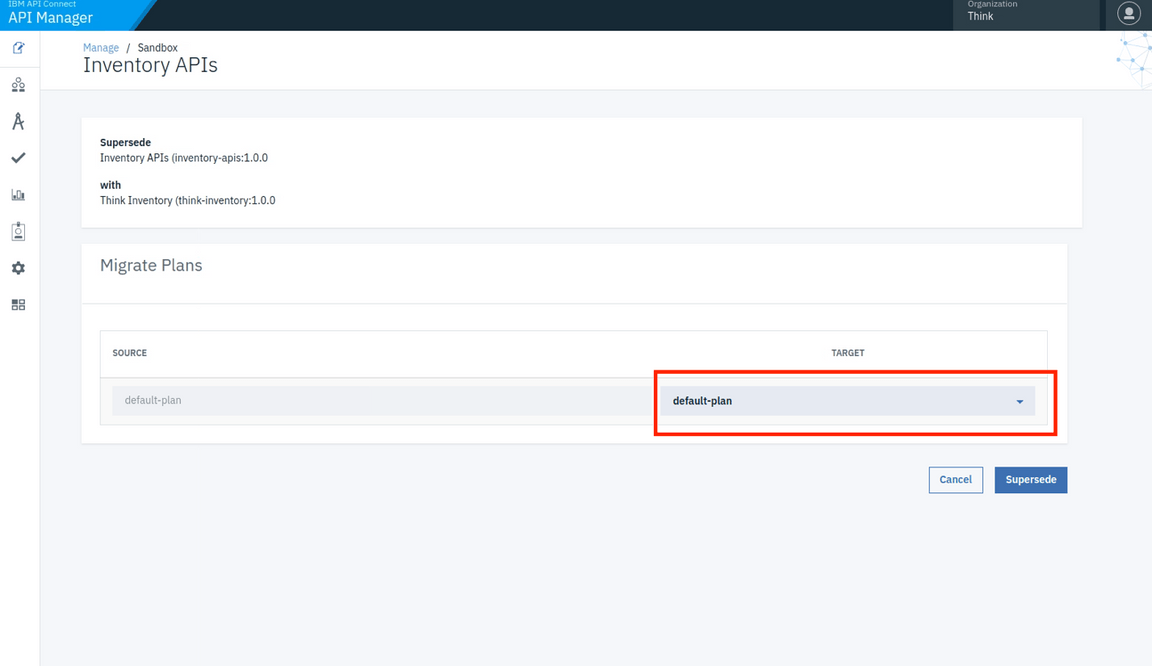
In order to maintain our consumers’ entitlements, we need to migrate their plan subscriptions.
Both of our Products have plans called[ Default Plan.] You will now choose to move subscribers from the Inventory Product’s default plan to the Inventory Product’s default plan.
In the drop-down menu, select Default Plan and then click [[Supersede]].
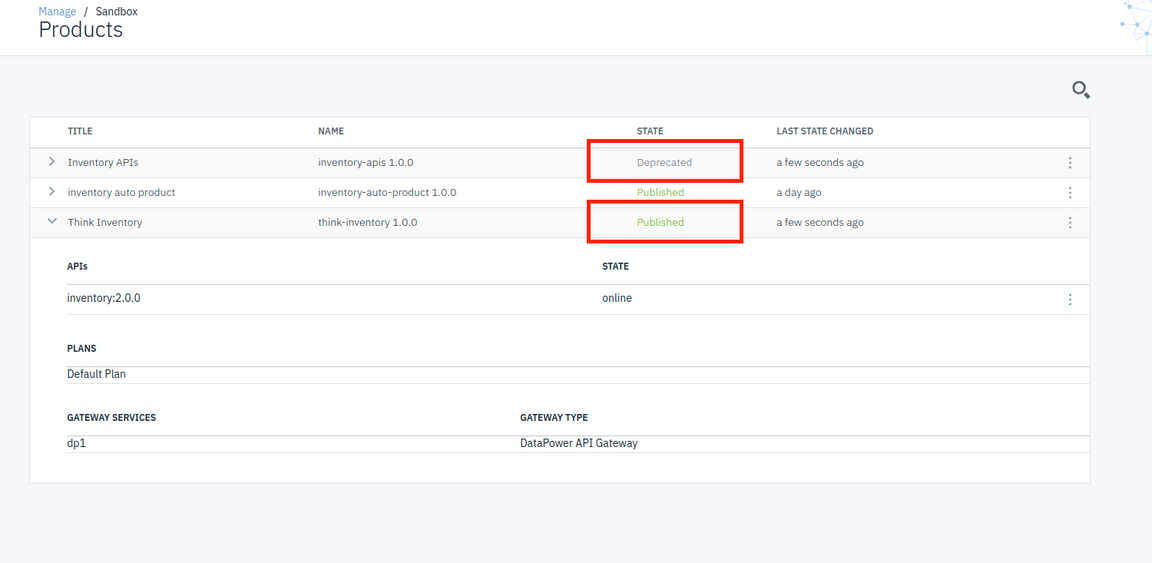
- API Connect will take care of deprecating the old product and publishing the new one. As a result, the new Inventory Products product will be published, while the old one will be automatically deprecated.
Test the OAuth Configuration
In this section, you will test the new version of the API to ensure that OAuth is working properly.
Open your API Portal in a new browser tab and log in with your developer account.
Click the [API Products] tab.
Notice that the old [Inventory APIs] product is no longer available. It has been replaced by your new [Inventory Products] product.
Click on the [ Inventory Products].
Note: There is no need to re-subscribe your application to the plan. By using [Replace] as the state change control, your subscription was automatically migrated. As a result, you’re already entitled to the API’s contained in the new Product’s Default Plan - including the O-Auth API.
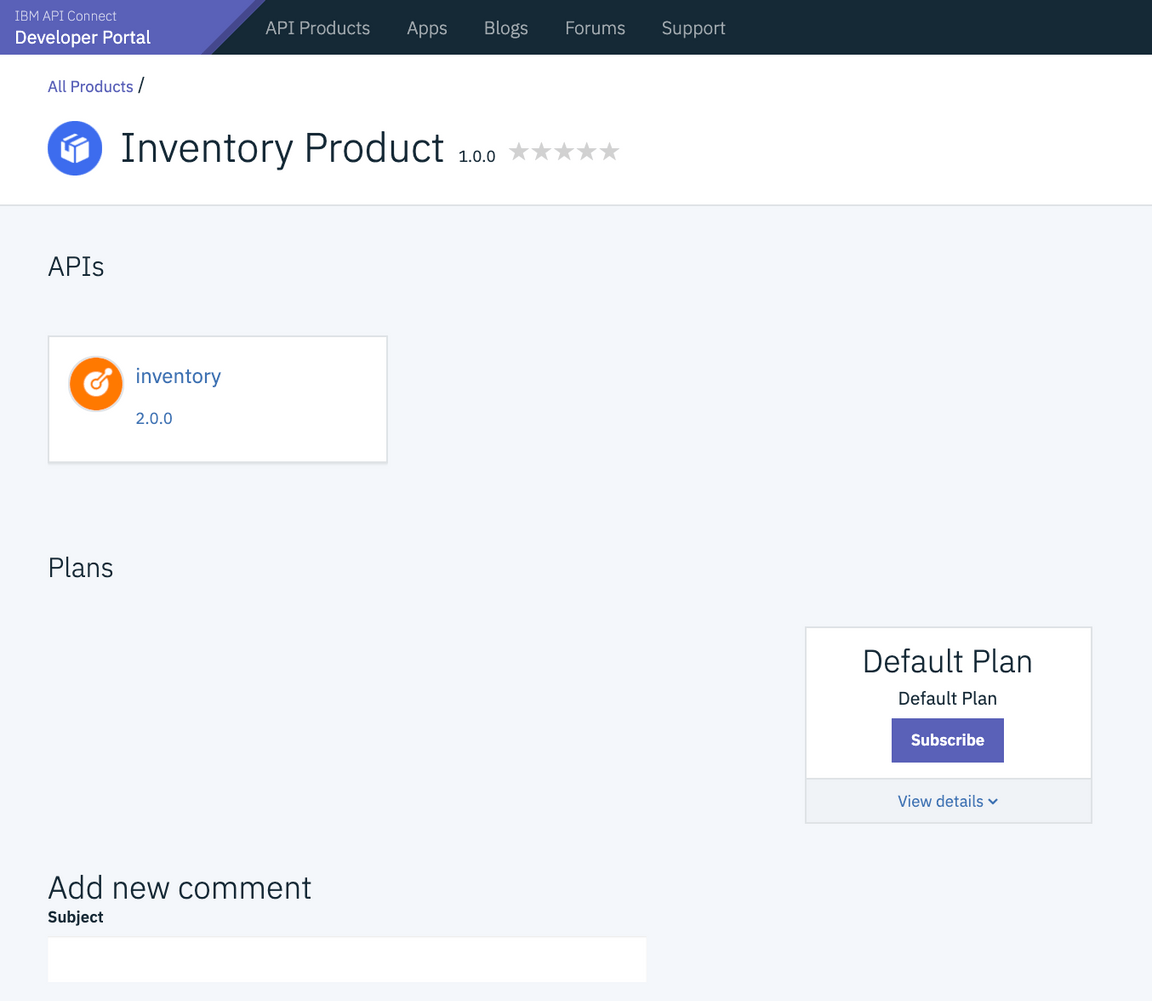
Select Subscribe Default Plan and then select IBM Consumer App to subscribe the app.
Click on the [inventory API] from the palette menu on the left.
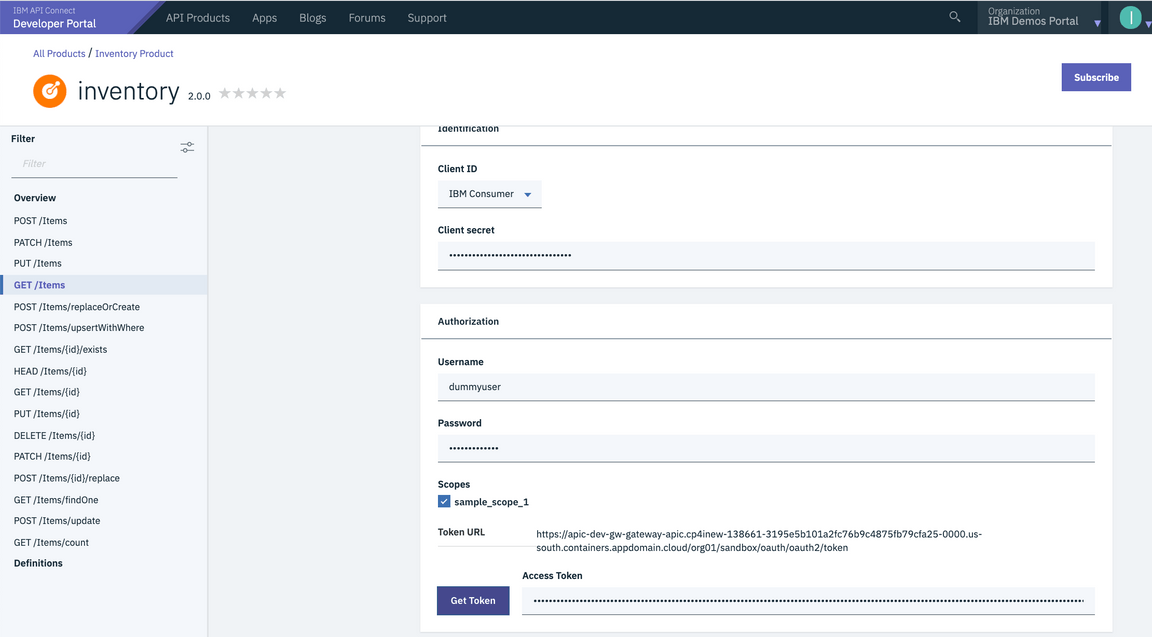
Select the [GET /Items] operation and click on the [Try It ]button at the top. Notice that we now have an additional OAuth security requirement defined.
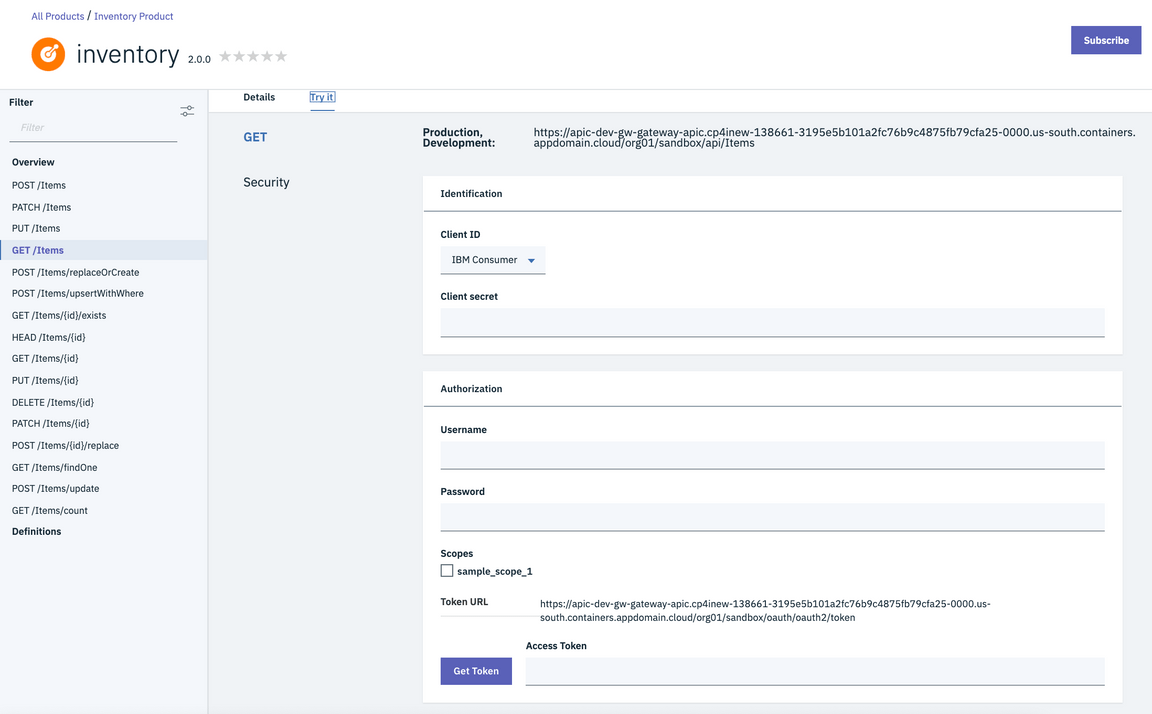
Scroll down to browse the invocation form.
Select your subscribed application from the [Client ID] drop-down menu.
Paste your secret into the [Client secret ]field.
In the [Username] and [Password] fields, you can enter any text. Select the inventory scope. Note: Recall that when we configured the OAuth API, we provided an Authentication URL as the method for validating the user credentials. The URL that we provided will respond back OK with any credentials.
Click the [Get Token] button to obtain an OAuth token.
The API Portal will call out to the OAuth Token URL with your client credentials and user credentials.
The OAuth API which you built in lab 3 will intercept the request, validate the credentials, and generate a token.
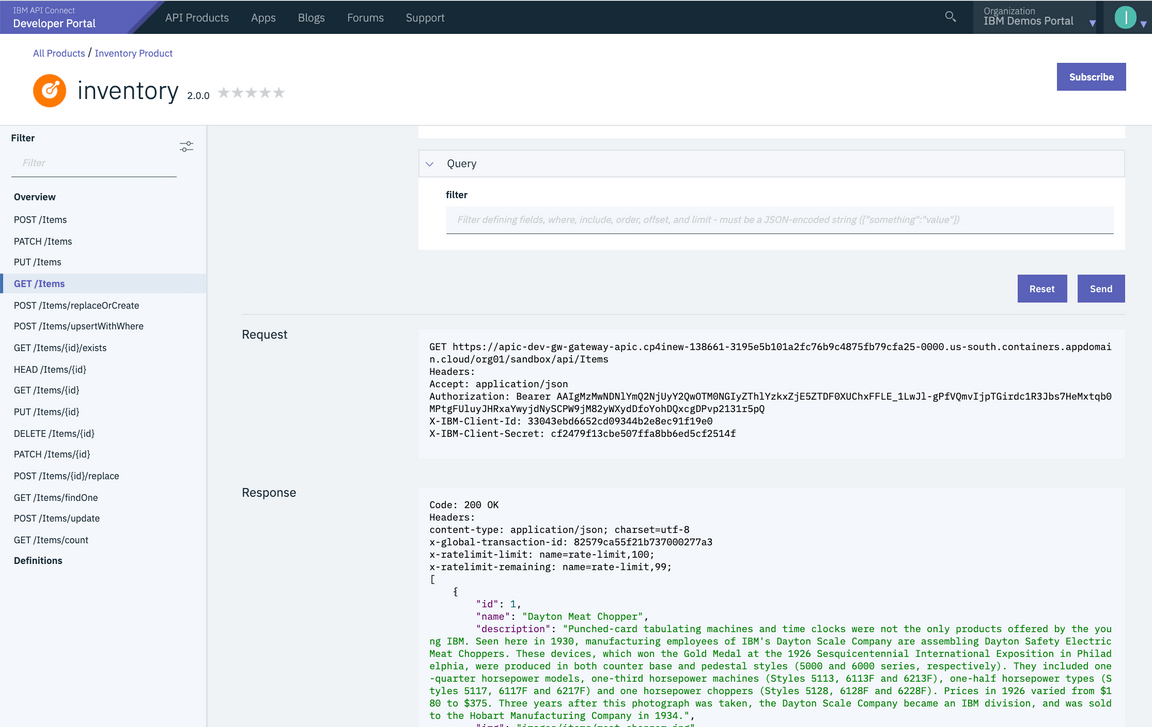
Click the [Send] button to invoke the API. The request will include the OAuth bearer token in the [Authorization] header.
Summary
You completed the APIC Dev Jam Lab 4 - Use Lifecycle Controls to Version your API. Throughout the tutorial, you explored the key takeaways:
Create a new API Product.
Supercede the Old Product.
Test Your OAuth API in the Developer Portal.
Continue the APIC Dev Jam! Go to APIC Dev Jam - Lab 5 - Advanced API Assembly to learn about adding business logic to the API Gateway through the use of policies.